How to change ownership of a Shared UW NetID

How to change ownership of a Shared UW NetID

If you are the owner of a Shared UW NetID, you can transfer ownership to another UW faculty or staff member by following these steps:

01 – Sign into:

https://uwnetid.washington.edu/manage/


02 – Click the drop-down next to Manage UW NetID:. Select the Shared NetID in question. You should be redirected to a management page for the Shared NetID in question.


03 – Click Owners and Administrators.


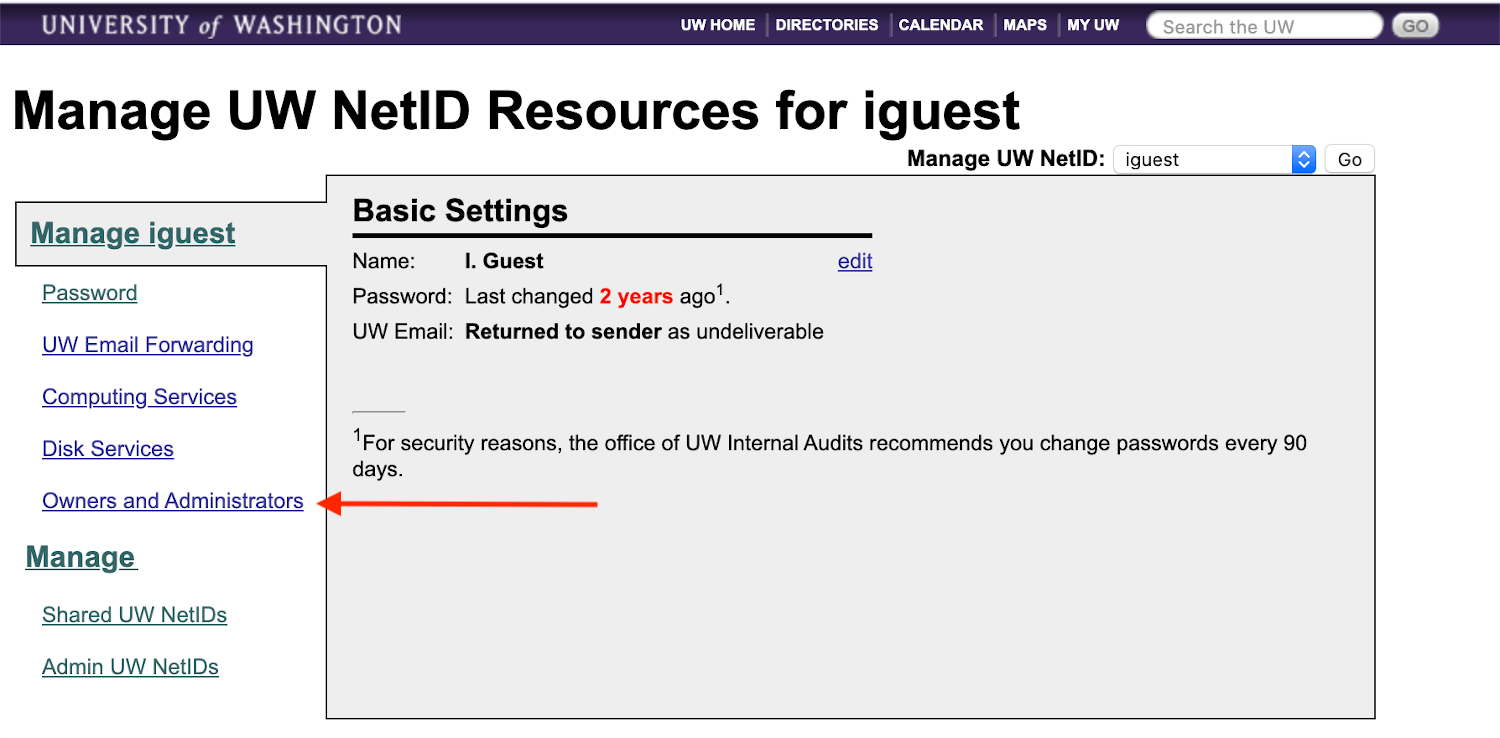
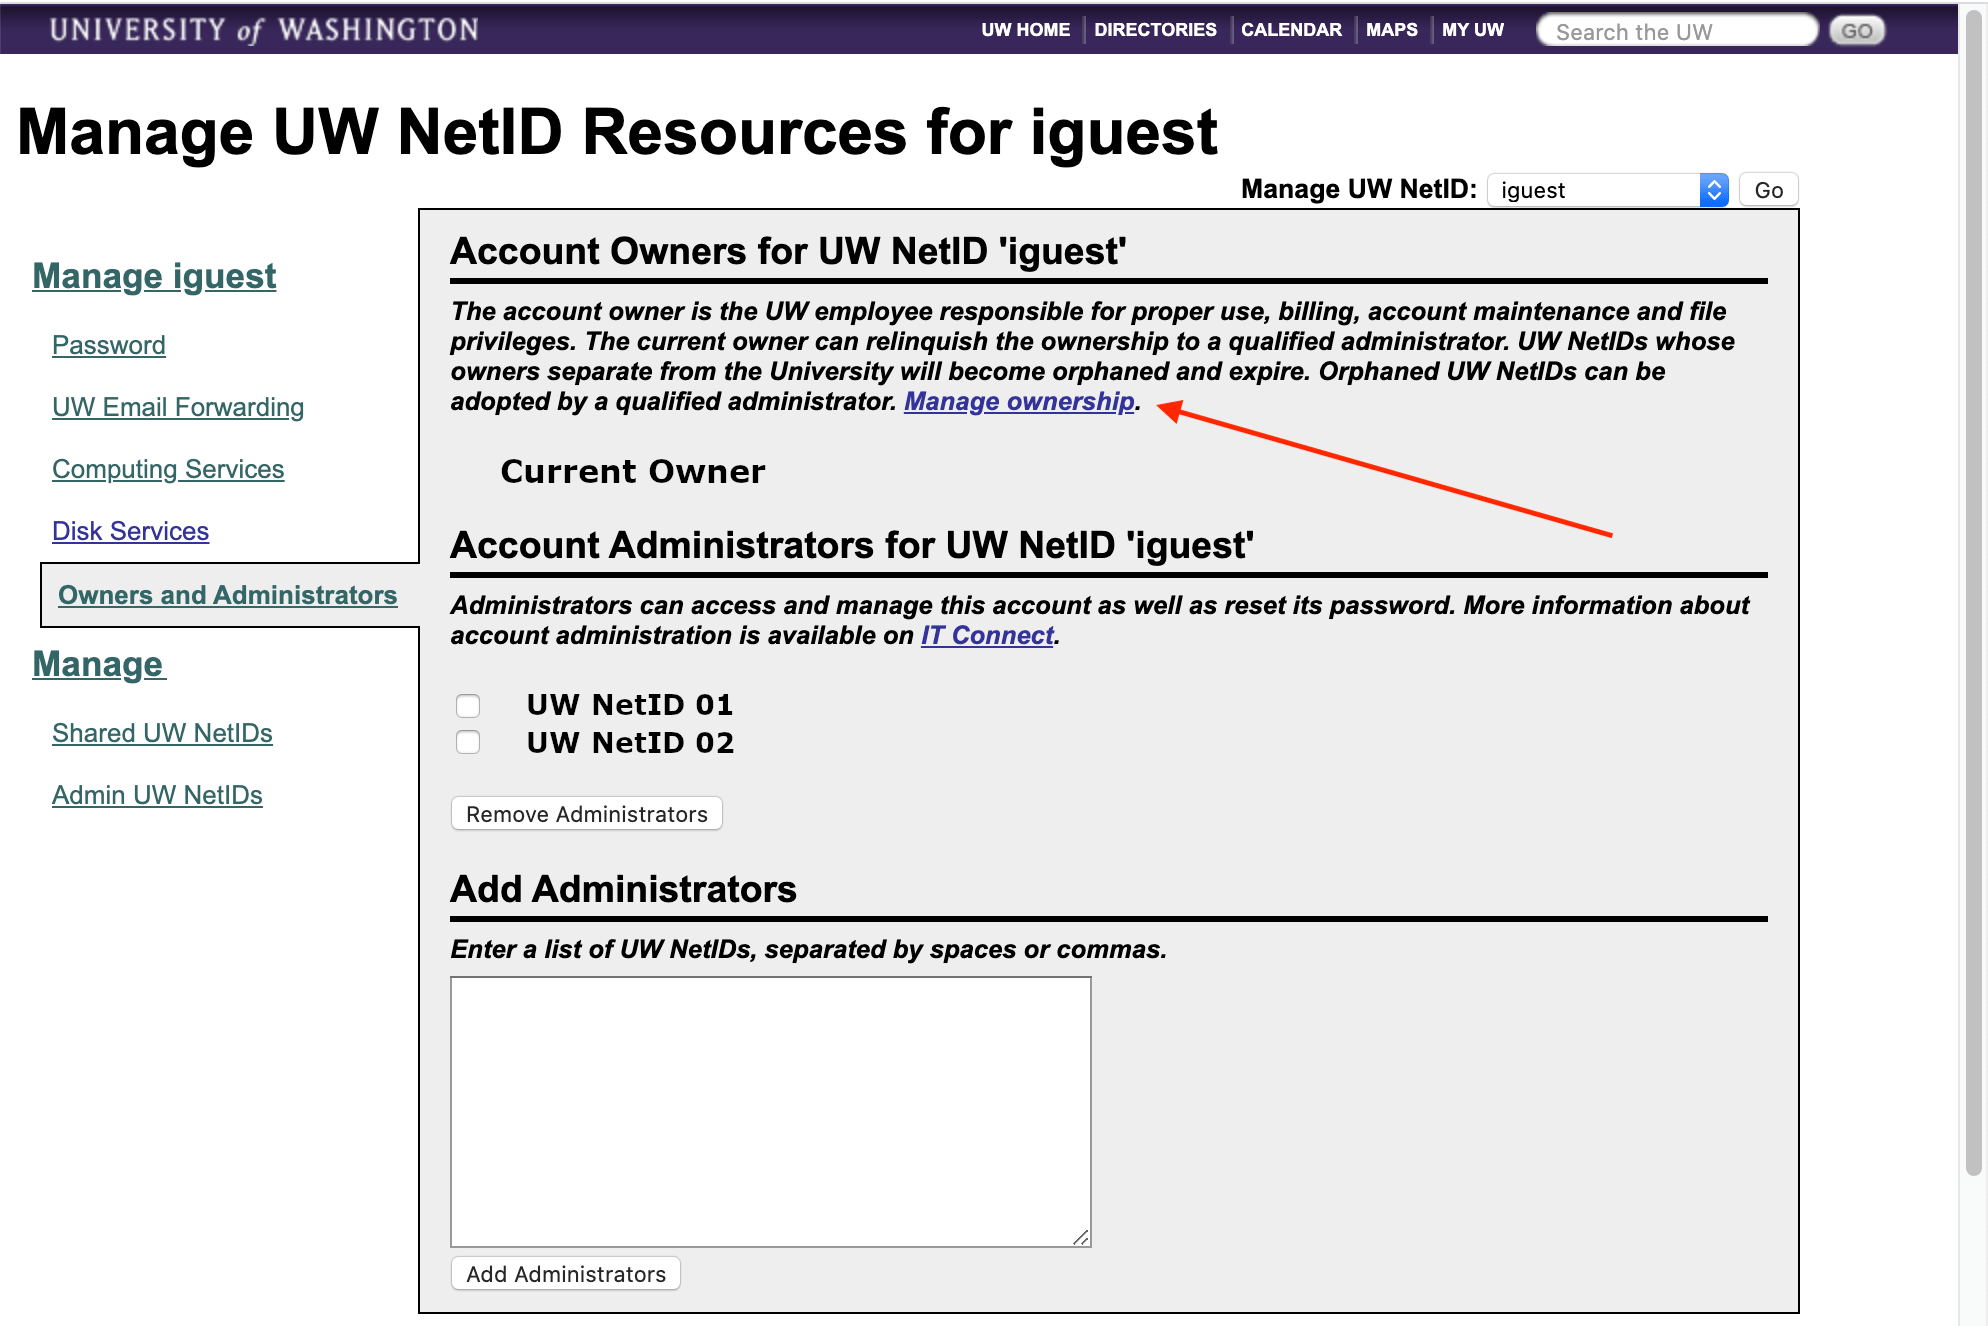
04 – If the UW NetID of the new, intended owner is not listed as an “Account Administrator”, you will need to add the new, intended owner in the “Add Administrators” box.


05 – Back on the Owners and Administrators page, click Manage ownership.


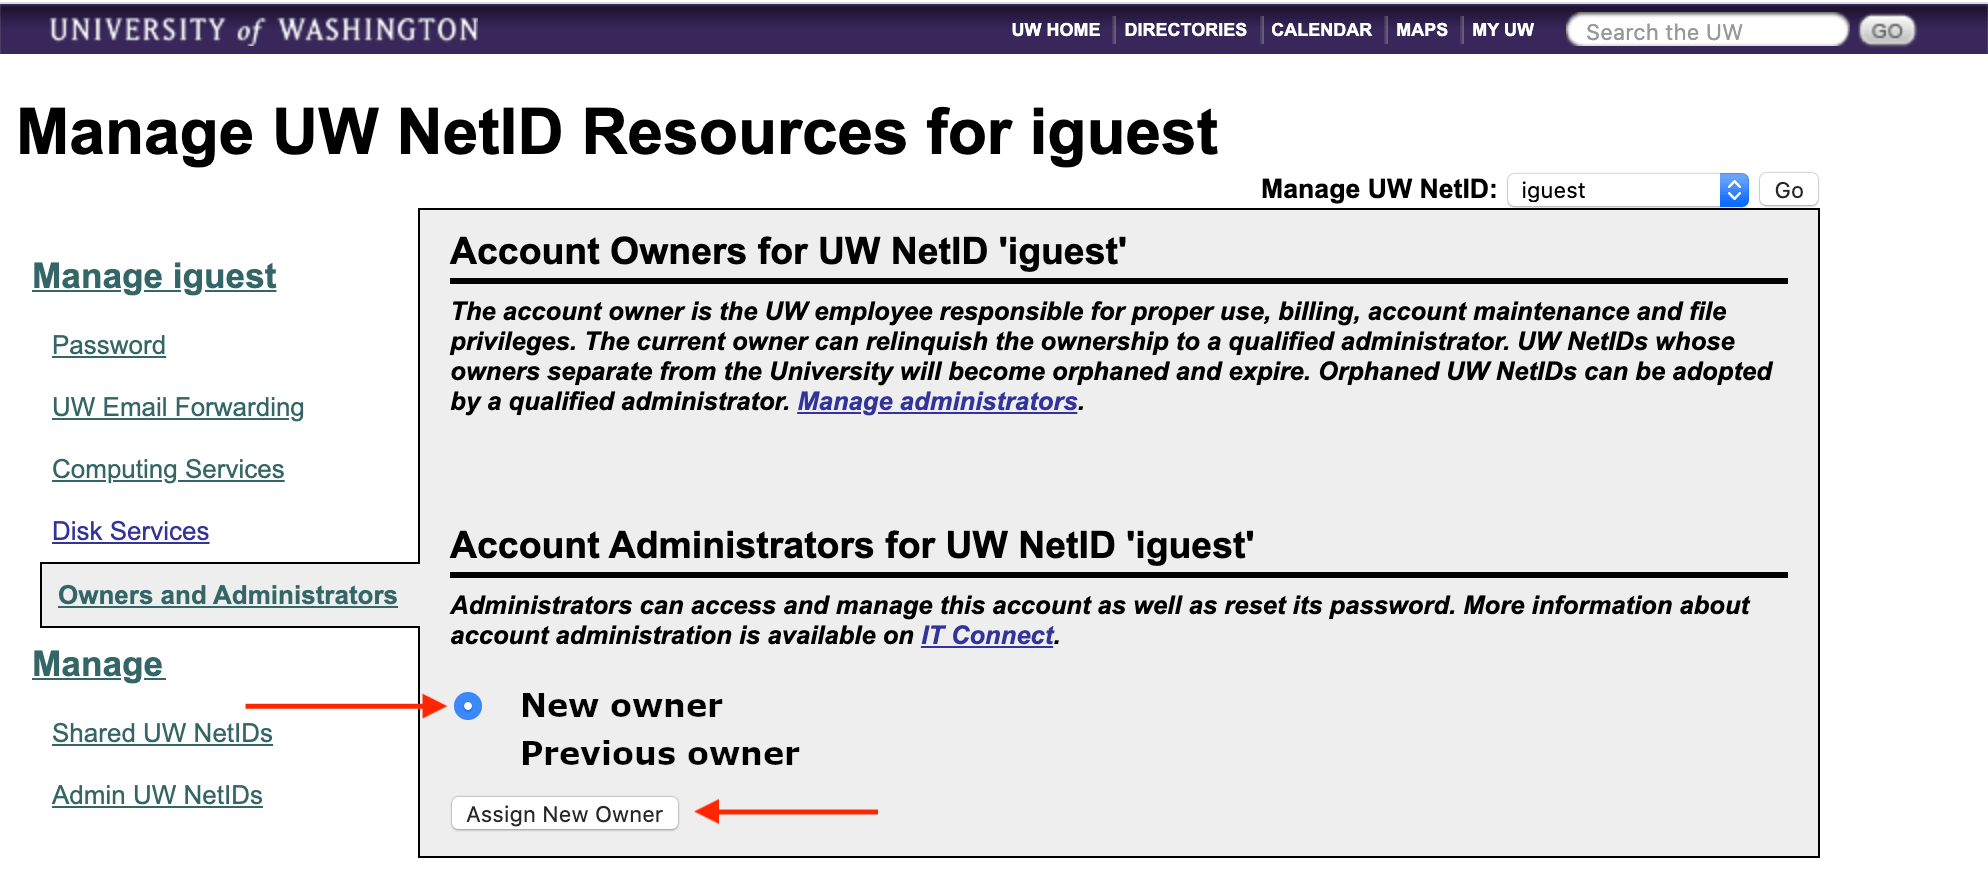
06 – Select the new, intended owner for the Shared NetID. Click Assign New Owner.


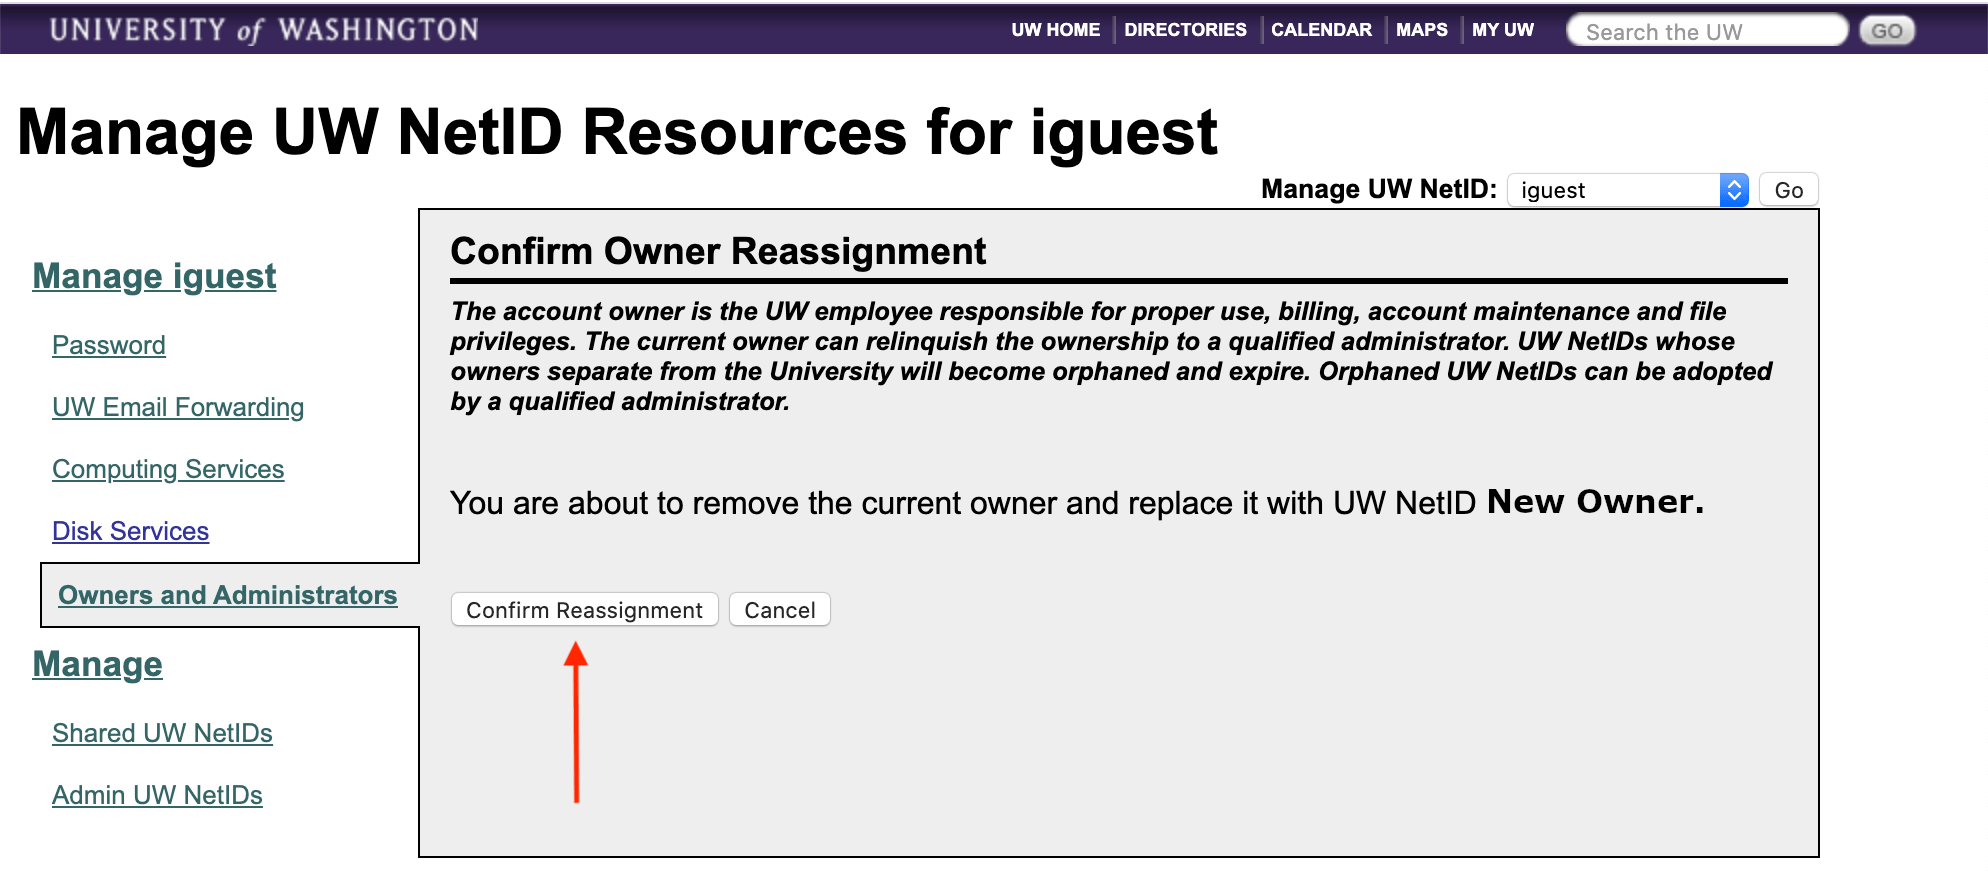
07 – Click Confirm Reassignment to complete the change.

Lenovo System Update

Lenovo System Update

iSchool-issued Lenovo brand laptops come with an application named “Lenovo System Update” installed.

The Lenovo System Update application regularly runs in the background to install driver updates.

Every once in a while, you may be faced with a notification telling you updates that require a computer restart are available. See example message below.


If you see the message, follow the instructions to apply the updates. In general, you should apply the updates as soon as you are able. While you have the option of clicking “Cancel”, you will need to install the updates sooner or later.

While the Lenovo System Update application does run on a regular schedule, you have the option to run it on demand, to look for driver, BIOS, and firmware updates by following the instructions on this page:

Lenovo System Update driver, BIOS, and firmware updates search

Microsoft Office Outlook default mail client error message

Microsoft Office Outlook default mail client error message

If you are using an iSchool-issued Windows laptop and continually seeing a pop-up message, with the wording “Either there is no default mail client or the current mail client cannot fulfill the messaging request. Please run Microsoft Outlook and set it as the default mail client.”, follow the steps below:


1) Quit Outlook.


2) If you are off campus, connect to the Husky OnNet VPN by following these steps:

https://itconnect.uw.edu/connect/uw-networks/about-husky-onnet/use-husky-onnet/#windows


3) Right-click the lower-left Windows icon, click Windows PowerShell (Admin), click Yes.


4) In the “PowerShell” application window that opens, type:

gpupdate /force

press “Enter” on your keyboard

after a few seconds, you should see wording indicating “Computer Policy” and “User Policy” updated successfully.


If you see wording that the “Computer Policy” and “User Policy” updated successfully, the Outlook “…no default mail client…” message should stop appearing.

Add or edit multiple SharePoint In/Out Board entries

Add or edit multiple SharePoint In/Out Board entries

This page includes directions for adding or editing multiple SharePoint In/Out Board entries.

01) go to the SharePoint In/Out Board:

https://uwnetid.sharepoint.com/sites/ischoolnew/sites/HumanResources/Lists/InOutBoard/

02) click edit

A screenshot of a cell phone

Description automatically generated

03) click the box next to a row to select the entire row (you can click-and-drag to select/highlight multiple rows), copy the row(s) using keyboard commands (Windows – Ctrl+C) (macOS – command+C)

A screenshot of a cell phone

Description automatically generated

04) scroll down to the bottom of the page/list to find an empty row entry, click the far-left-box next to the empty row, paste the row(s) using keyboard commands (Windows – Ctrl+V) (macOS – command+V)

A screenshot of a cell phone

Description automatically generated

05) click the calendar icon to edit the date as necessary, click the drop-down button next to other entries to edit as necessary

A screenshot of a cell phone

Description automatically generated

A screenshot of a cell phone

Description automatically generated

06) when edits are complete, scroll to the top of the page/list, click Stop to save your edits

A screenshot of a cell phone

Description automatically generated

Avaya VoIP Phone Software (softphone)

Avaya VoIP Phone Software (softphone)

The Avaya VoIP phone app (currently called “Avaya IX Workplace”, formerly called “Avaya Equinox” and “Avaya one-X Communicator”) is the recommended and supported softphone app for your Avaya VoIP telephone.

Here are the UW-IT instructions for installing the Avaya app:

https://itconnect.uw.edu/wares/uware/avaya-ix-workplace/

Be sure to install the app while you are on campus and connected to a UW wired or wireless network.

Here are some instructional videos provided by UW-IT:

https://itconnect.uw.edu/connect/phones/service/softphone/

If you are using a Mac, follow these additional steps once you have finished following the above instructions.

Security while Traveling

Traveling abroad, especially to countries where free access to the Internet is restricted, can be tricky and safeguards should be taken. The UW Office of the Chief Information Security Officer (CISO) has some good recommendations here:

https://ciso.uw.edu/education/risk-advisories/travel-tips/

The iSchool IT Help Desk also has a fleet of checkout equipment you are welcome to use if you don’t want to take your iSchool device abroad. WE have mobile devices/phones as well as laptop computers:

https://ischool.uw.edu/technology/equipment-checkout

“Shared Device” Adobe Creative Cloud application login

The Adobe Creative Cloud suite of applications is installed on all computers in Mary Gates Hall rooms 430 and 440.

To use the Adobe Creative Cloud suite of applications you must supply login credentials. Users need to create what Adobe calls an “Adobe ID” out of any email address. Creating an “Adobe ID” is zero cost. Do not use your @uw.edu address to create an “Adobe ID.”

An “Adobe ID” can be created at the application login screen or at any time at the website: account.adobe.com

More information about creating an “Adobe ID” can be found on this website: https://helpx.adobe.com/manage-account/using/create-update-adobe-id.html

Lenovo laptop reset button

Lenovo laptop reset button

Lenovo laptops with non-removable batteries have a “power/battery reset” button that is useful to use when troubleshooting problems with:

– laptop not powering on
– external devices (including monitors) not being recognized by the laptop
– power adapters (battery chargers) not being recognized by the laptop
– messages about the power adapter

The actions below do not affect any software or settings.

—-

Follow these steps to use the “power/battery reset” button:

– Disconnect computer from all cables, including monitors and power adapters.
– Shutdown computer.
– Find a paperclip, toothpick, or other small pointy object.
– Turn computer upside down.
– Stick the paperclip (or other object) in the small hole on the bottom of computer. You should feel a click.

– Click the button a few times.
– Click the button and hold it down for 60 seconds.
– Plug the power adapter back into the computer.
– Turn the computer back on.
– Plug external devices and/or cables back into the computer.