Anything to do with any Operating System, Application or the iSchool Software Image. How to use it, how to update it, how to configure it, etc. This includes SharePoint.
Occasionally iSchool IT will ask you to perform the following steps to troubleshoot a setting or solve a problem with your Windows computer. The steps below reapply any “Group Policies” set to apply to your computer:
1) Save any files you may be working on. Quit unnecessary, open applications. The process may require restarting the computer.
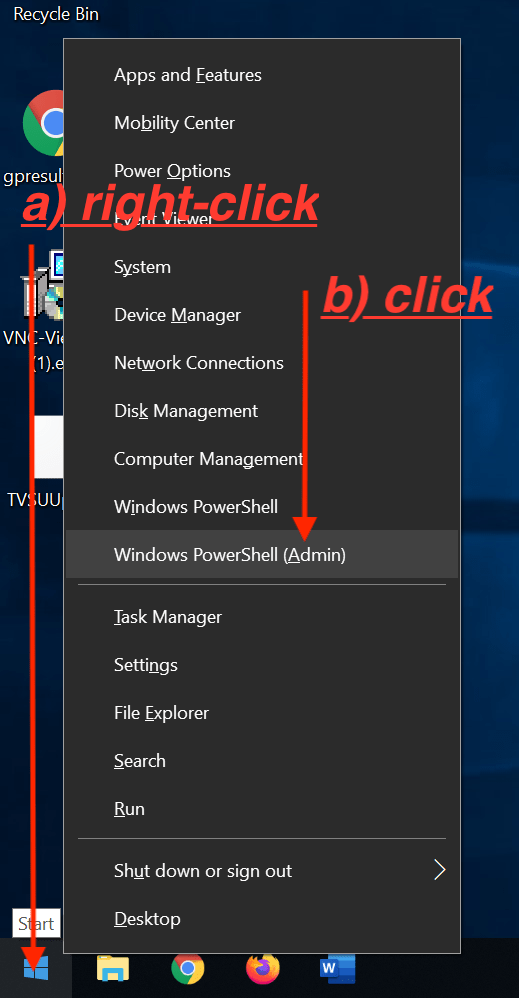
3) Right-click the lower-left Windows icon, click Windows PowerShell (Admin).
4) Click Yes when prompted with the “Do you want to allow this app…” question.
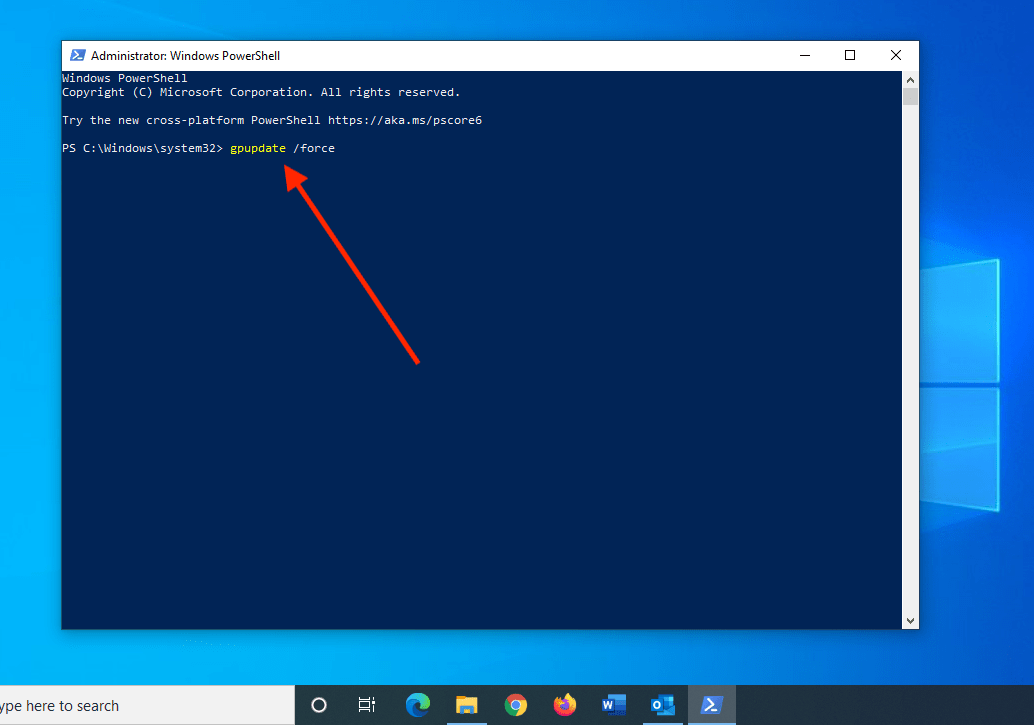
5) In the “Windows PowerShell” window that opens, type:
gpupdate /force
Press Enter on your keyboard.
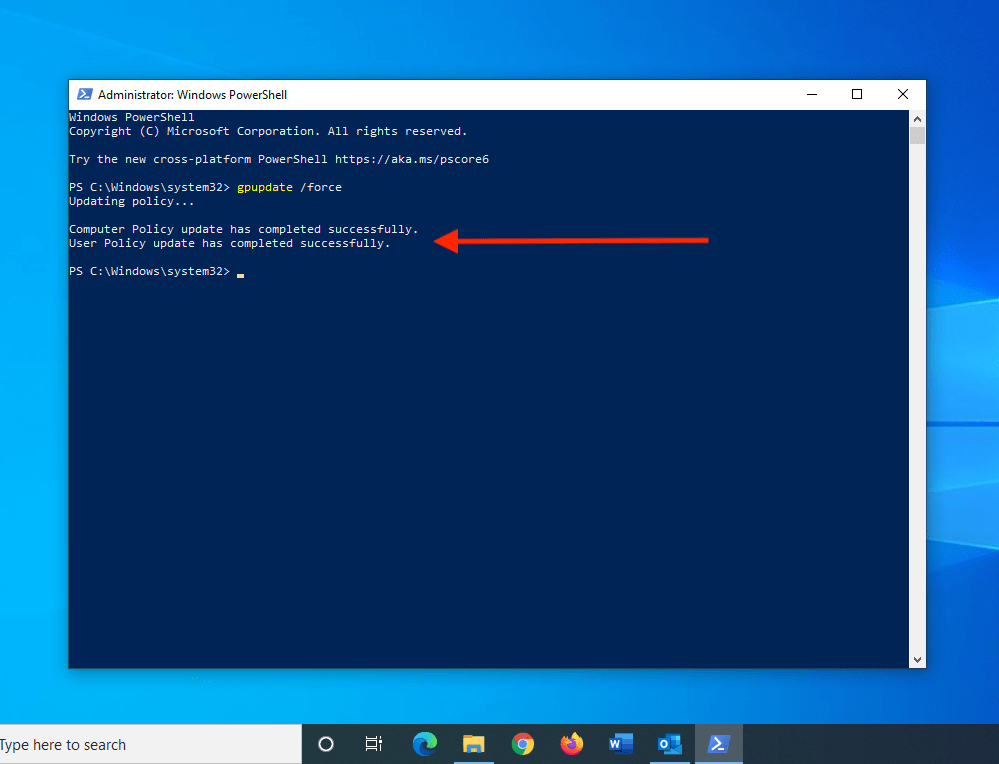
6) You will see wording like “Updating policy…”. The process could take a few minutes. You should see wording that the process completed successfully. You may be asked to restart your computer, if so, restart your computer.
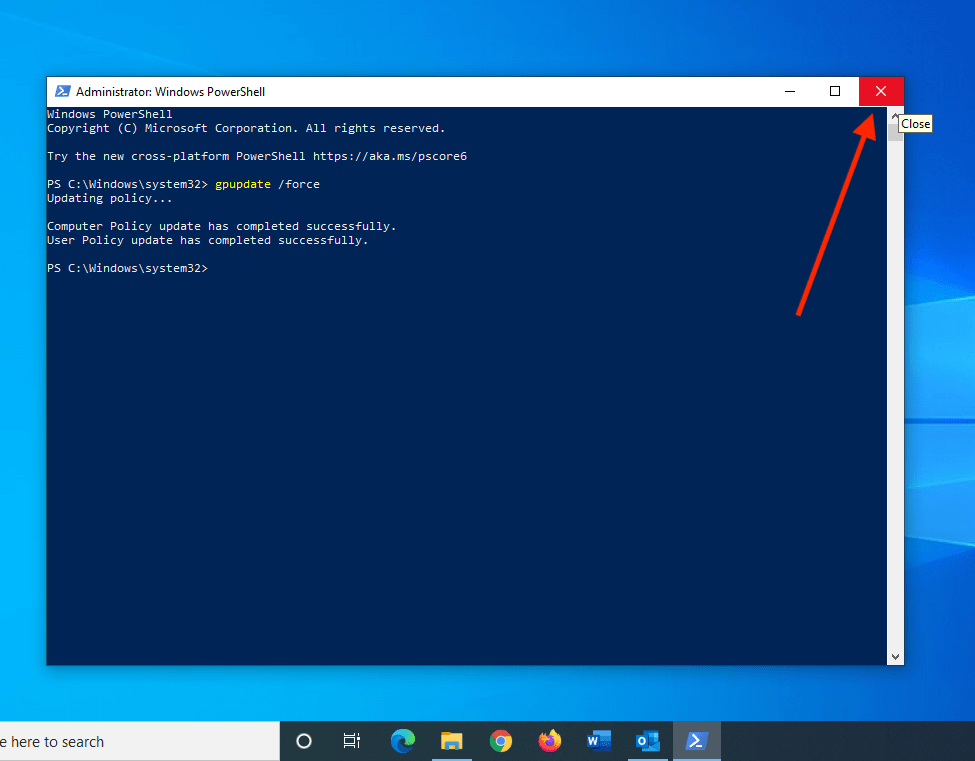
7) If a computer restart is not needed, close the Windows PowerShell window by clicking the top-right “X”.
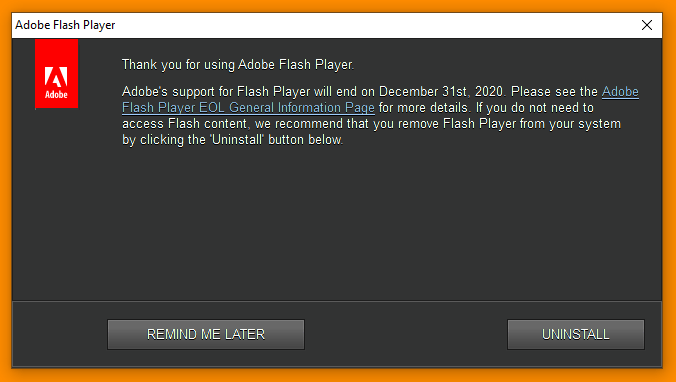
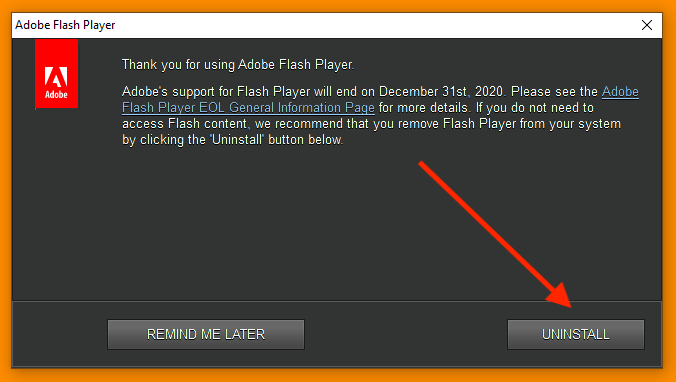
There was a time when Adobe Flash was preinstalled on all iSchool computers. If you see a pop-up message recommending the removal of Adobe Flash Player, uninstall it:
1. Click UNINSTALL, click Yes to allow changes…
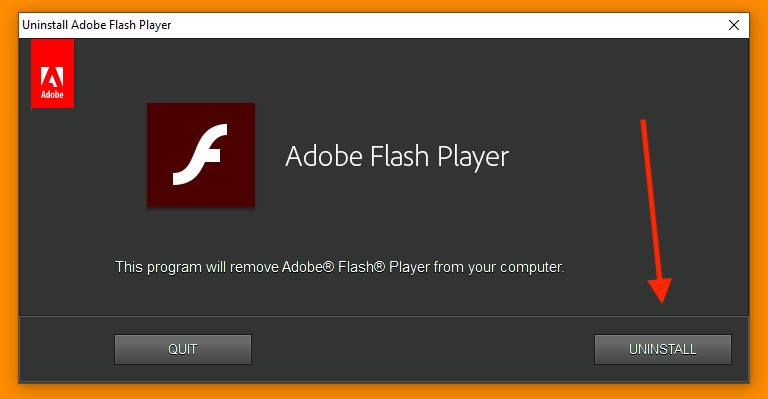
2. Click UNINSTALL
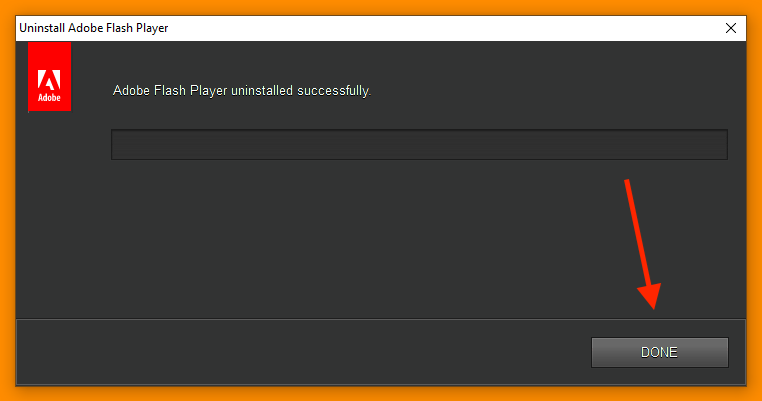
3. Wait for the uninstallation to finish, click DONE
There are times when we want to share Files/Folders with people who are not associated with the UW and who do not have a UW NetID. Here are your options and some limitations.
OneDrive
You can only share files in your personal UW OneDrive for Business with people that have a UW NetID.
Workarounds include:
Sponsoring a UW NetID for the external collaborator(s) and then provisioning the UW Office 365 service for them.
Creating a Shared UW NetID, provisioning the UW Office 365 service for it, and then sharing the credentials for this NetID with all the external collaborators. Of course, this negates any security and auditing and you risk the credentials for the Shared NetID getting passed around.
SharePoint
You are able to share Files and Folders and Sites in SharePoint Online with anyone that has a Microsoft Account.
Note this can be ANY Microsoft Account (Hotmail, Outlook.com, etc.) and does not need to be a Microsoft 365 Account.
Any email address can be a Microsoft Account so collaborators don’t have to sign up for anything new.
You can also share anything in SharePoint Online anonymously meaning no login required.
If HIPAA or FERPA compatibility is a concern, this is your only option.
Google Drive
You are able to share Files and Folders in both your personal UW Google Drive and in a UW Shared Google Drive (formerly known as a Team Drive) with ANY Google Account.
Note any email address can be a Google Account so collaborators don’t have to sign up for anything new.
You can also share anything in any Google Drive anonymously meaning no login required.
If HIPAA or FERPA compatibility is a concern, Google Drive is not an option.
N Drive
It is not possible to share anything on the iSchool N Drive (our network file share) with anyone that does not have a UW NetID.
Accessing the N Drive from off-campus requires the Husky OnNet VPN (which also requires a UW NetID).
As with any programming language, you will inevitably run into problems, confusing situations, or just general questions when working in R. Here are a few ways to start getting help
1. Read the error messages: If there is an issue with the way you have written or executed your code, R will often print out an error message in your console (in red in RStudio). Do your best to decipher the message—read it carefully, and think about what is meant by each word in the message—or you can put that message directly into Google to search for more information.
2. Built-in documentation: RStudio provides built-in documentation. Functions and behaviors are all described in the same format, and often contain helpful examples. To search the documentation within R (or in RStudio), type a question mark (?) followed by the function name you’re using (e.g, ?sum). You can perform a broader search of available documentation by typing two questions marks (??) followed by your search term (e.g., ??sum).
You can also look up help by using the help() function (e.g., help(print) will look up information on the print() function, just as ?print does). There is also an example() function you can call to see examples of a function in action (e.g., example(print)).
3. Packages: R packages do not ship with the R software by default, but rather need to be downloaded (once) and then loaded into your interpreter’s environment (each time you wish to use them). The base R software provides install.packages() function for installing packages, and the library() function for loading them. The following example illustrates installing and loading the stringr package:
# Install the `stringr` package. Only needs to be done once per computer
install.packages("stringr")

# Load the package (make `stringr` functions available in this `R` session)
library("stringr") # quotes optional here, but best to include them
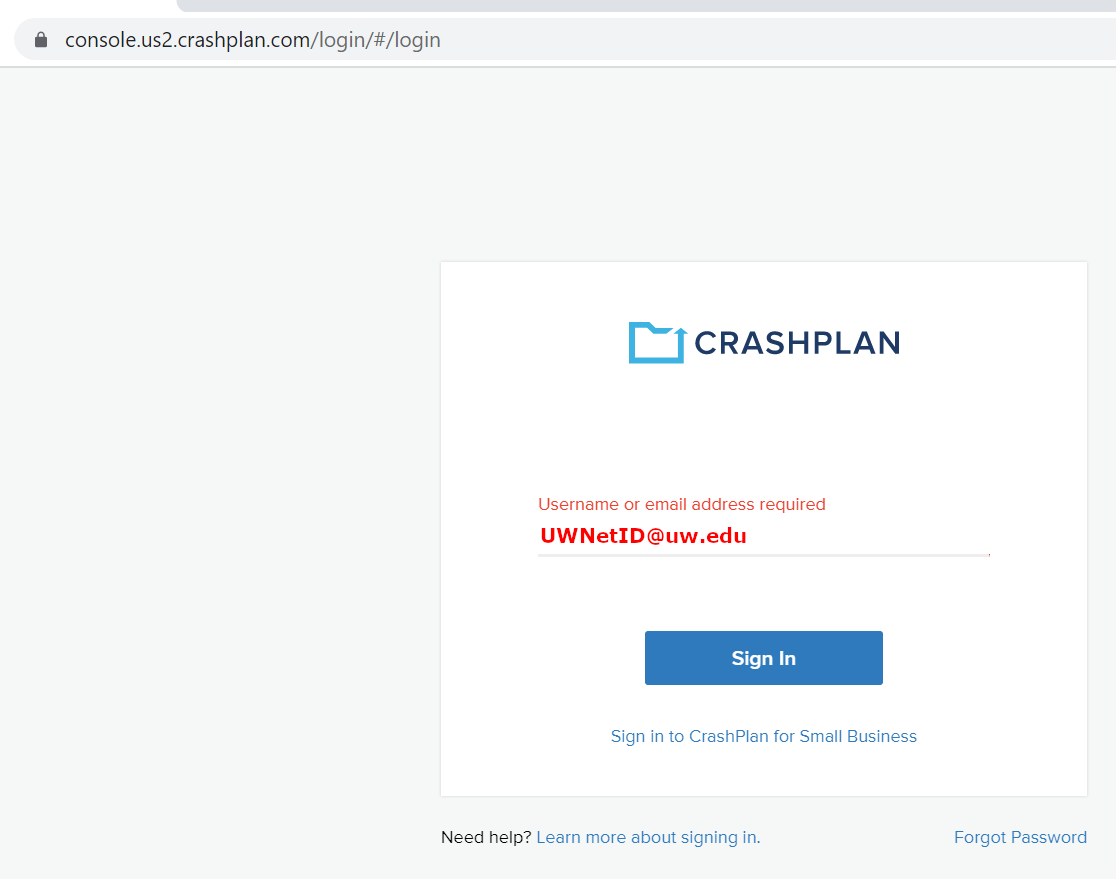
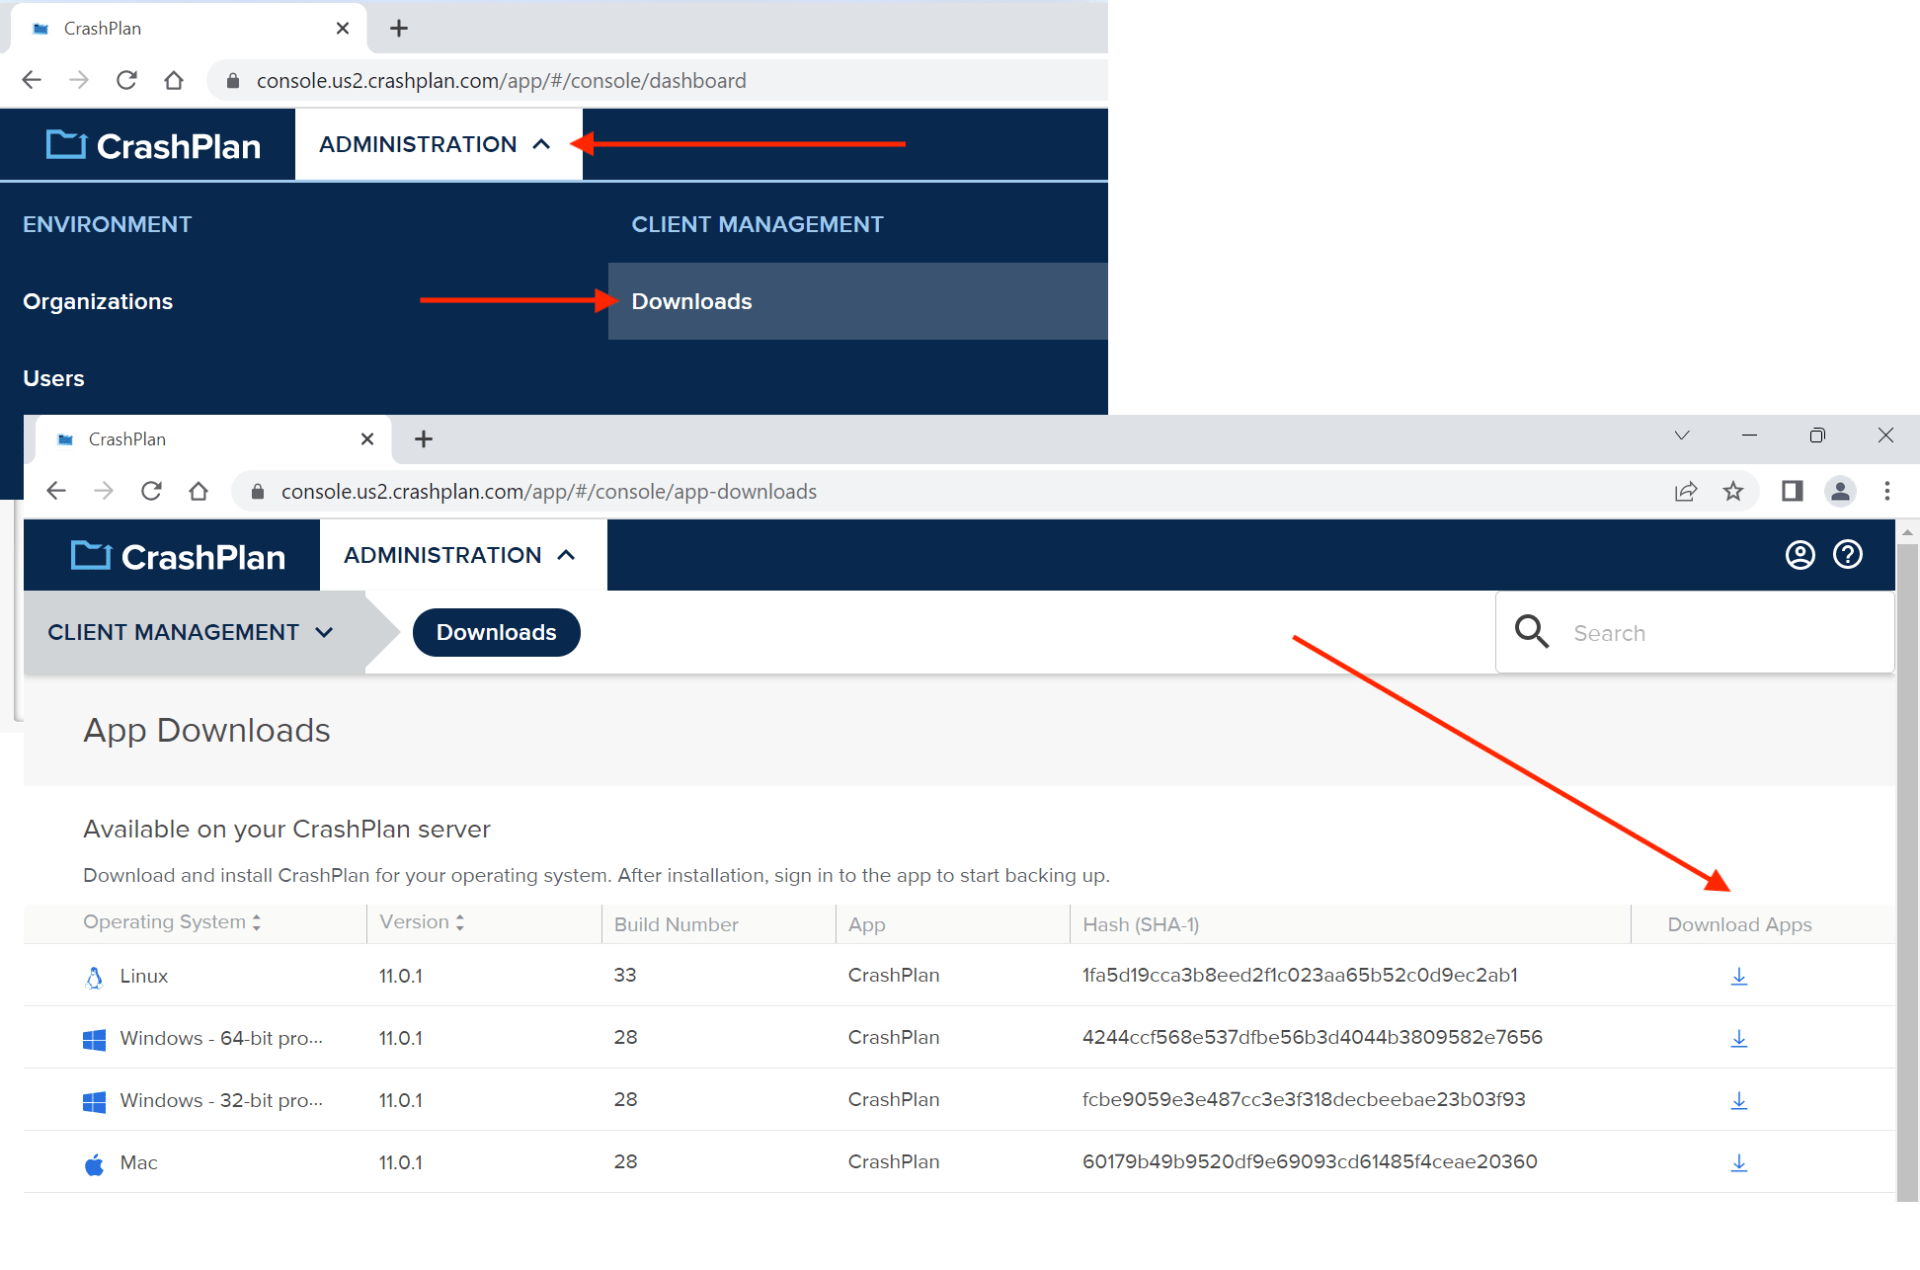
This page includes detailed instructions for installing the CrashPlan file backup software used on all iSchool faculty, staff, and PhD student computers.
Enter your @uw.edu email address. Click Sign In. Authenticate with your UWNetID@uw.edu credentials when asked.
2. Mouse-over ADMINISTRATION, underneath CLIENT MANAGEMENT click Downloads, click the download icon for the most-recent, highest-number-version of the Windows – 64-bit option to download the installer file.
3. Double-click the downloaded .msi file to install CrashPlan; use/select all of the default installer settings.
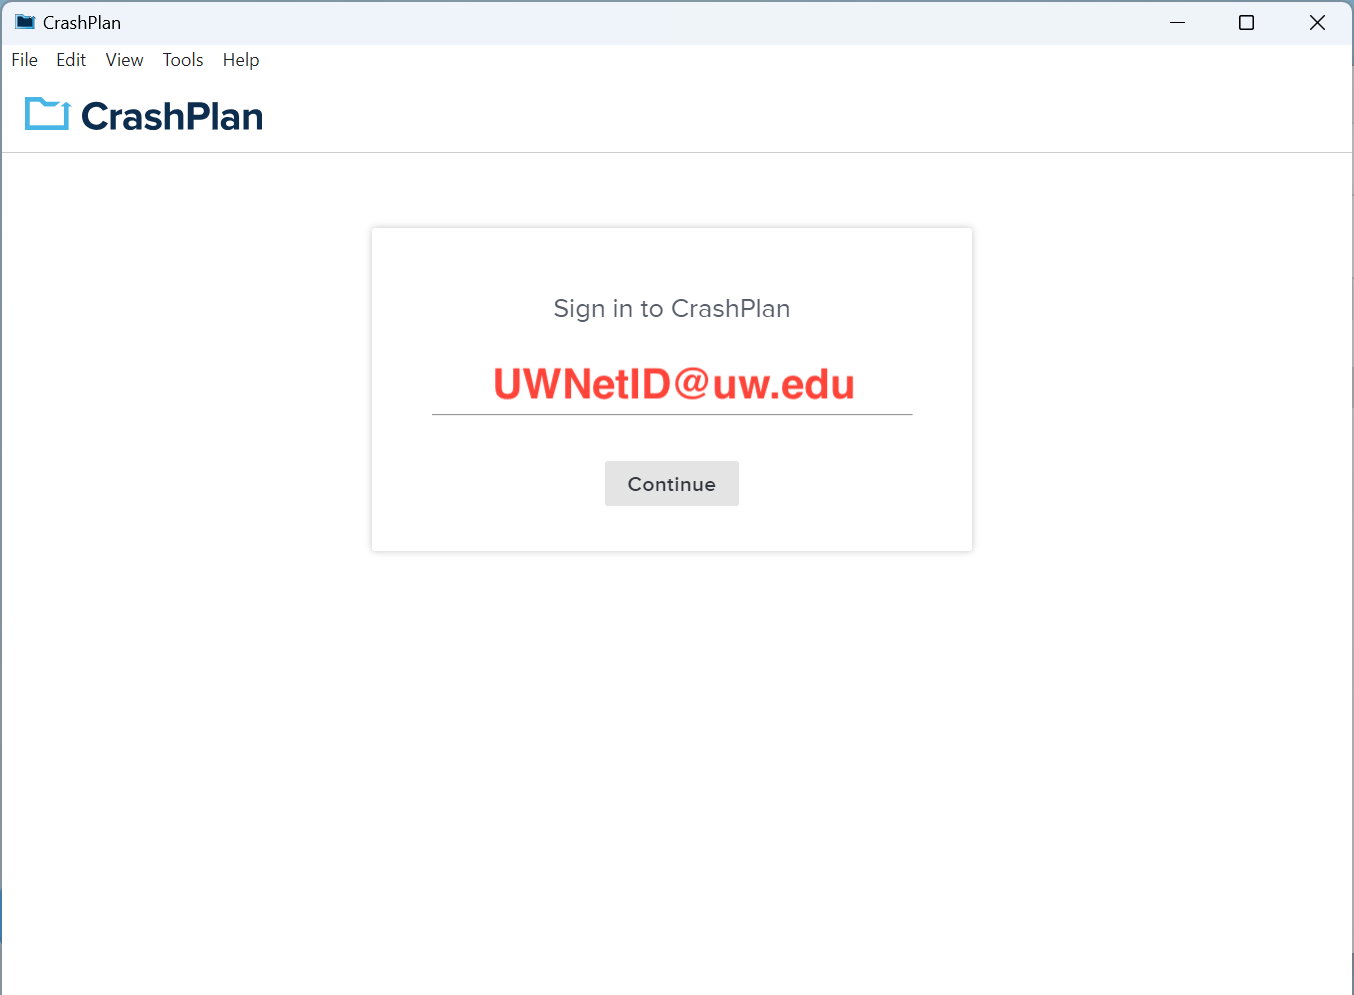
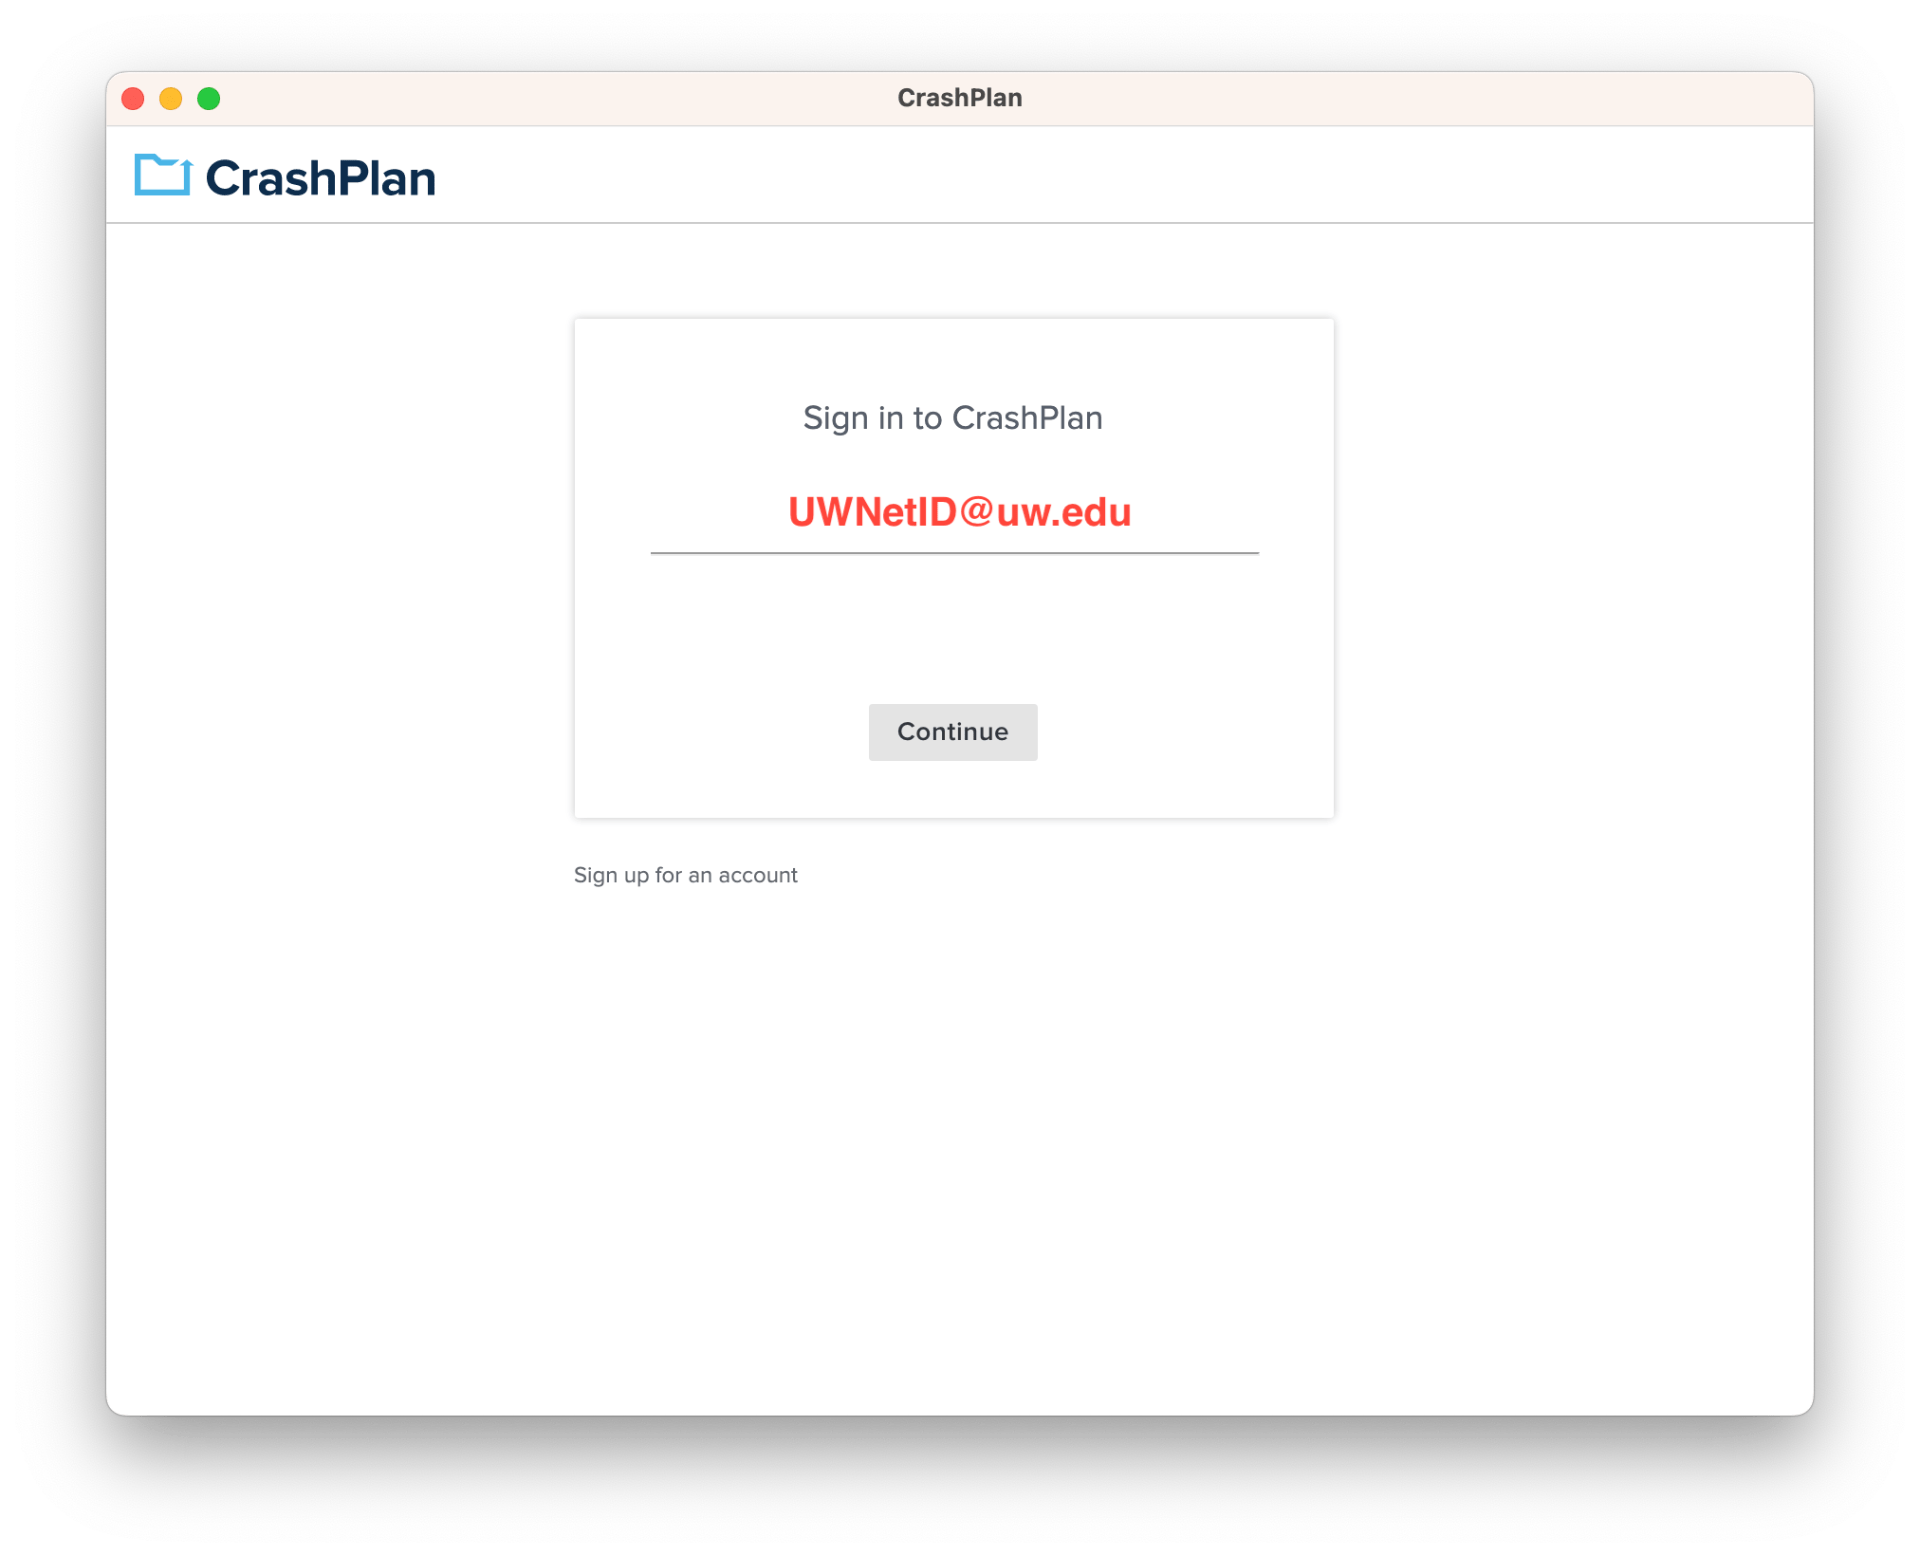
4. Start the CrashPlan application (if it does not open after installation), use the following settings:
Username: UWNetID@uw.edu
Click Continue.
Authenticate with your UWNetID@uw.edu credentials if asked.
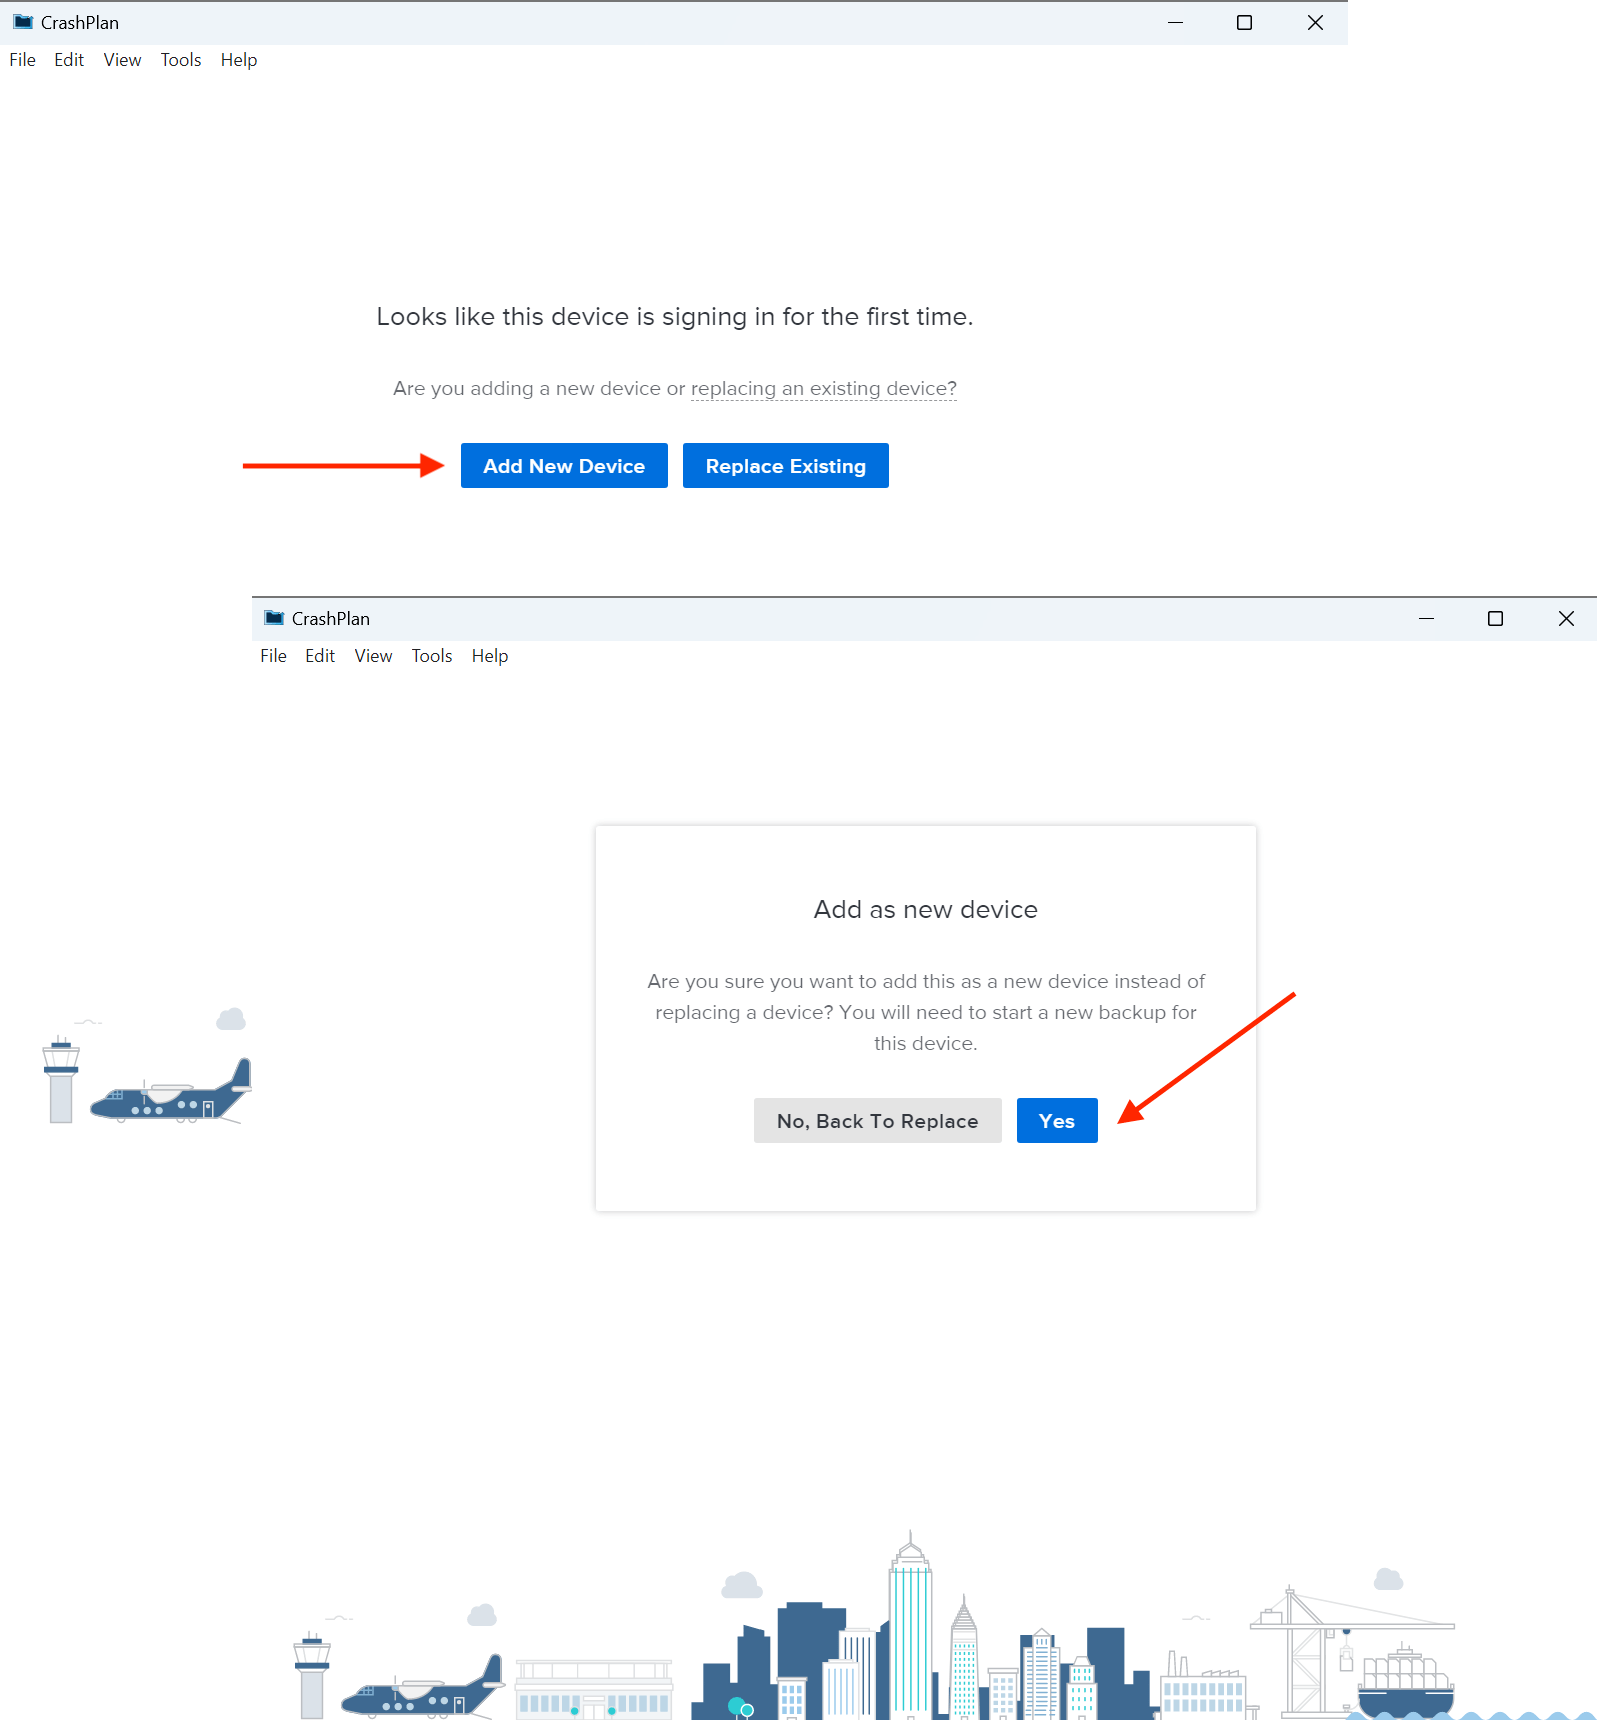
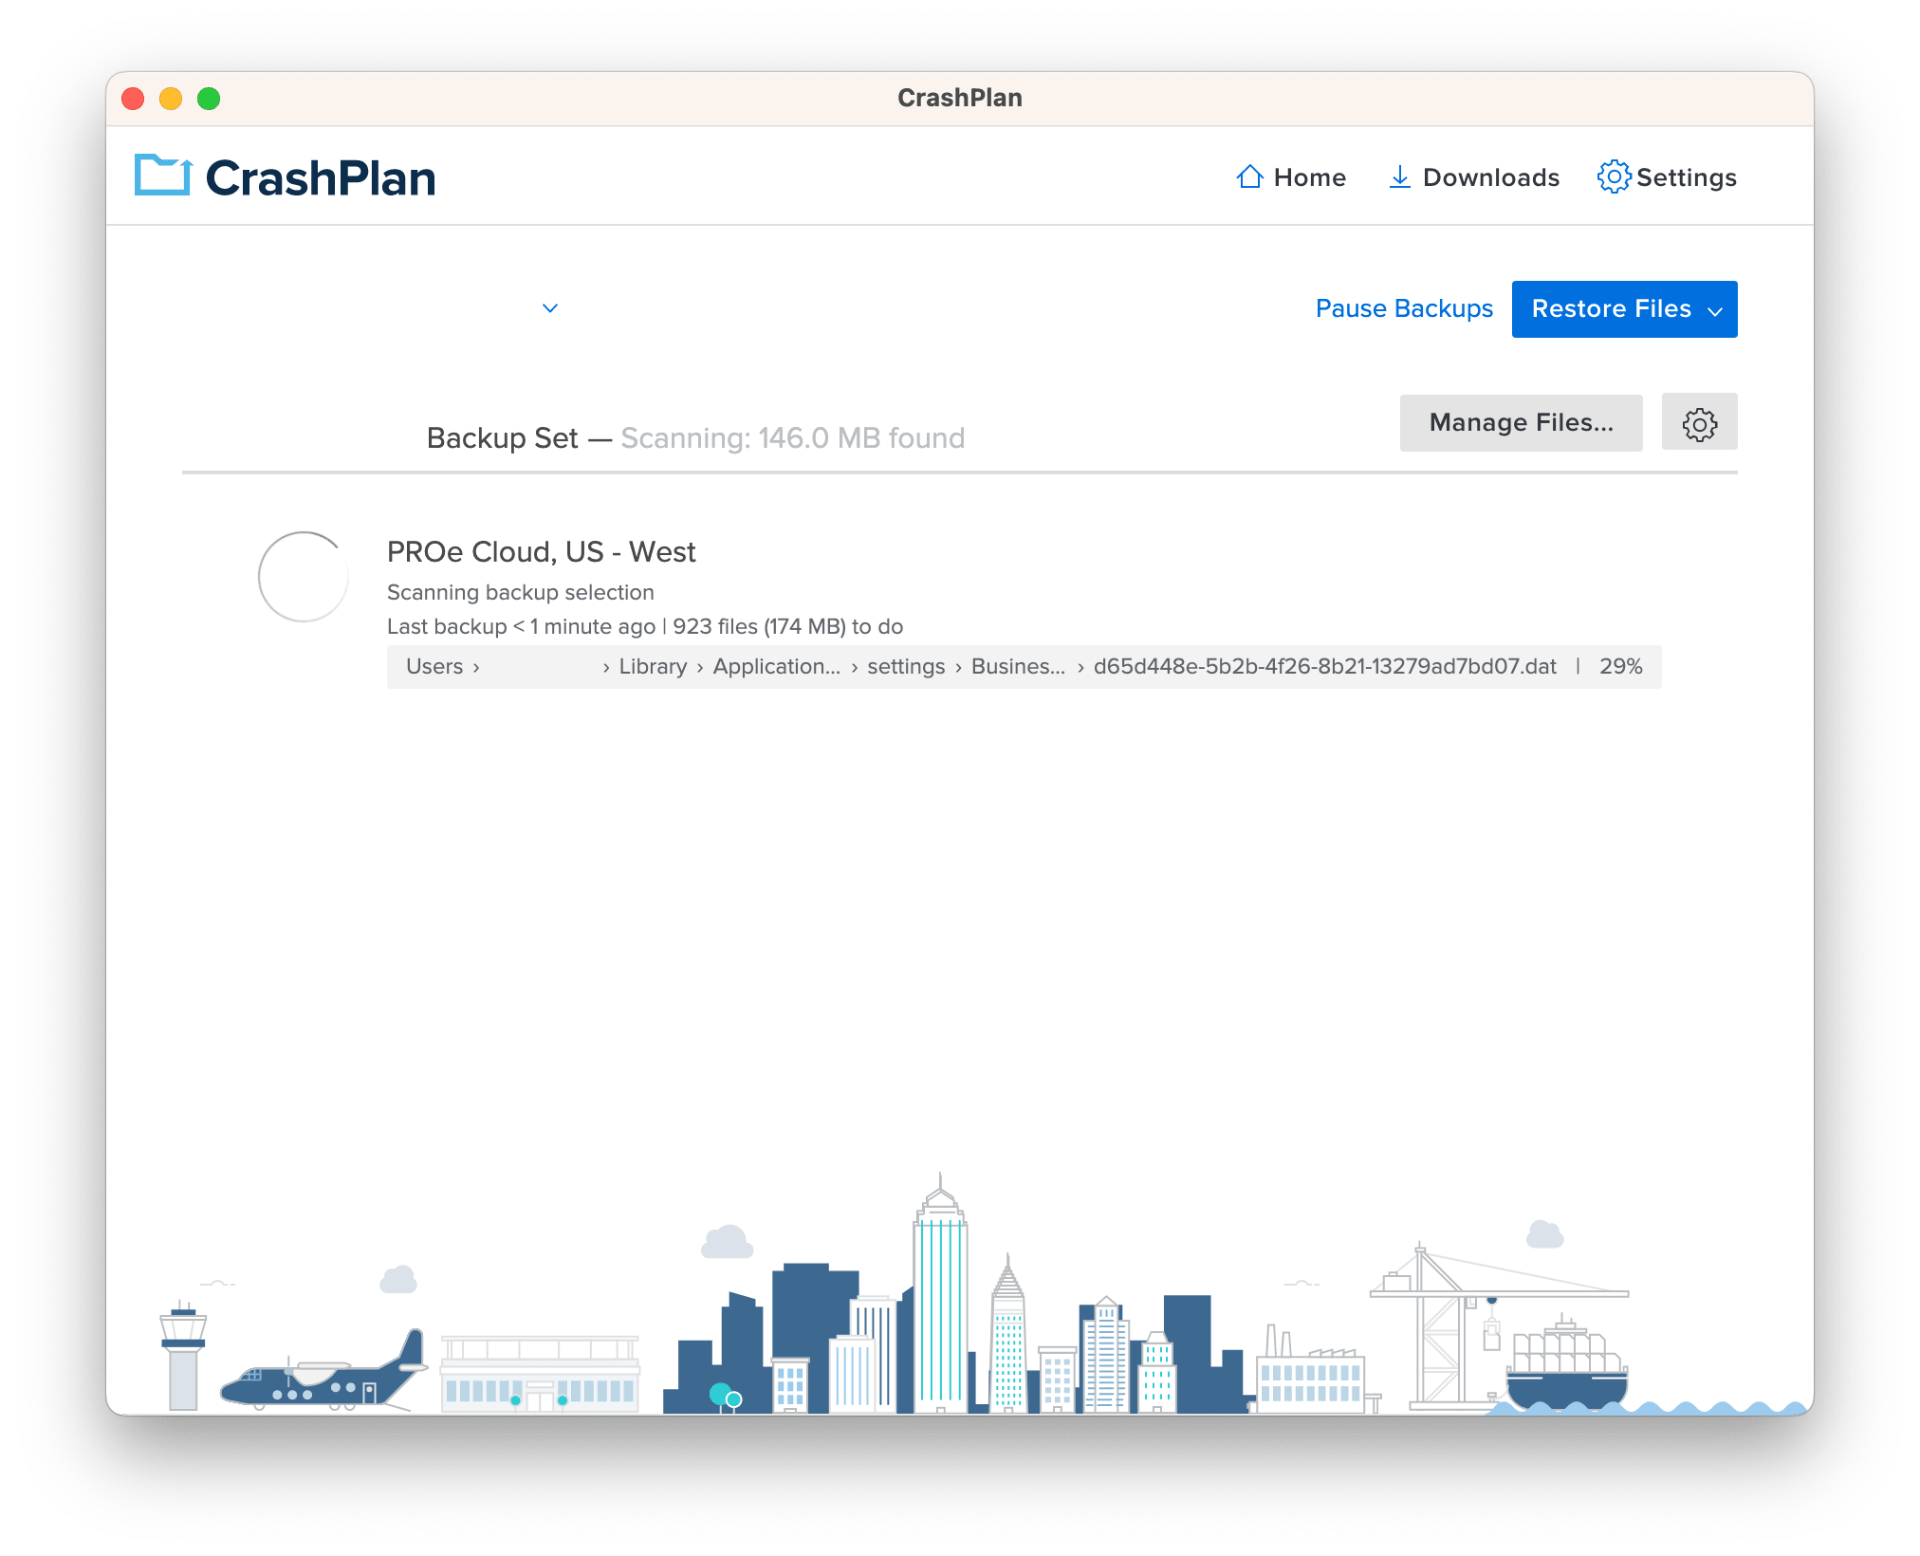
5. Click Add New Device at the “…never backed up” screen, click Yes at the “Add as new device…” screen.
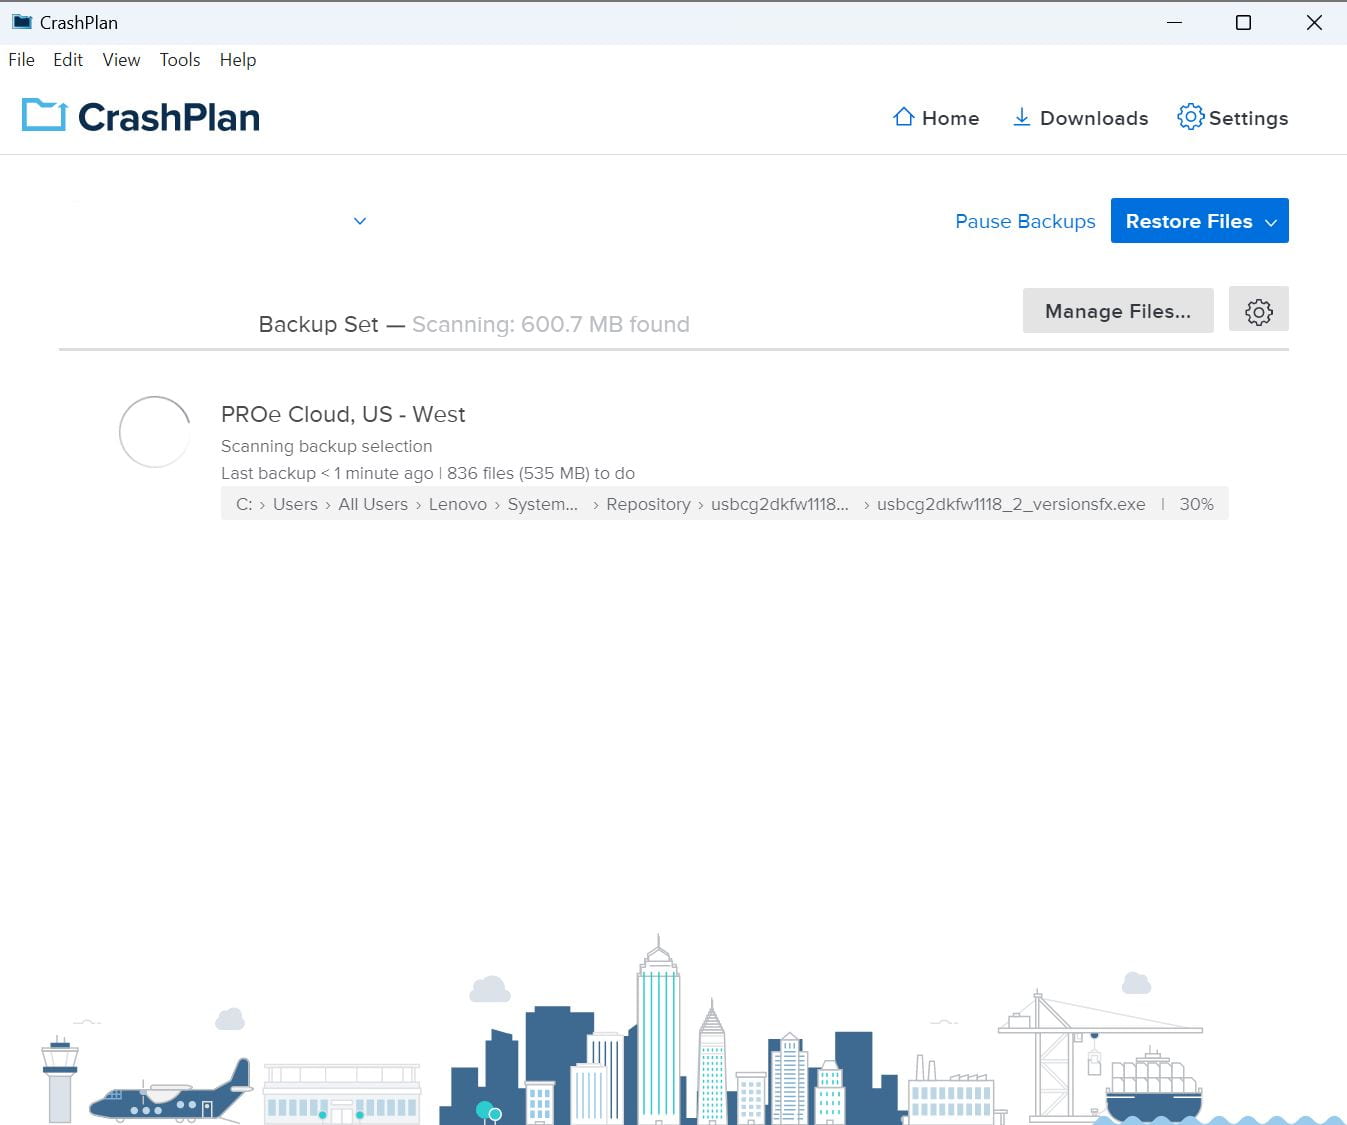
6. The CrashPlan application will start backing up the computer.
Enter your @uw.edu email address. Click Sign In. Authenticate with your UWNetID@uw.edu credentials when asked.
2. Mouse-over ADMINISTRATION, underneath CLIENT MANAGEMENT click Downloads, click the download icon for the most-recent, highest-number-version of the Mac option to download the installer file.
3. Open the downloaded .dmg file, double-click the Install CrashPlan.pkg file, click Continue, click Install.
4. Start the CrashPlan application (if it does not open after installation), sign in using the following settings:
Username: UWNetID@uw.edu
Click Continue.
Authenticate with your UWNetID@uw.edu credentials if asked.
5. Click Add New Device at the “…signing in for the first time…” screen, click Yes at the “Add as new device…” screen.
6. The CrashPlan application will start backing up the computer.
This page includes detailed directions to add a supplemental, Shared NetID email account to Outlook. The following directions assume you have permissions to access a Shared NetID’s email account. If you need permissions to access a Shared NetID’s email account contact the iSchool IT Help Desk.
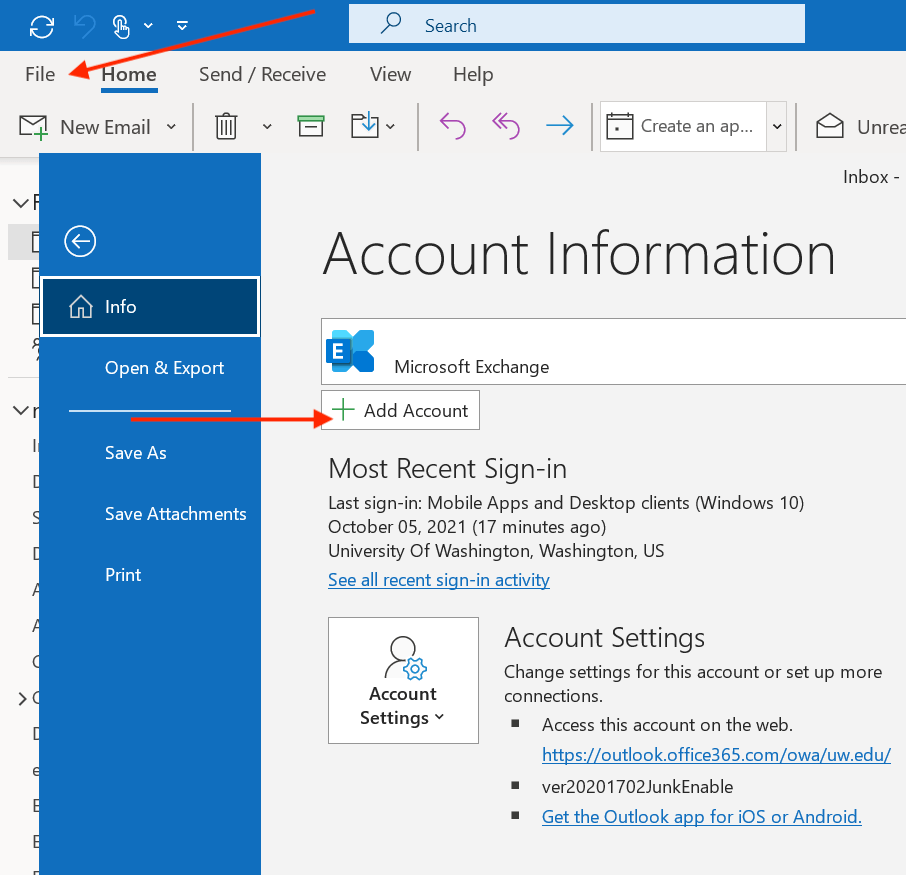
1. In the Outlook application, click File, click Add Account
2. Type in the Shared NetID email address (ihelp@uw.edu is used as an example), click Connect
3. Click Sign in with another account, enter your personal @uw.edu email address, click Next.
4. Use your UWNetID@uw.edu credentials at the “Sign in” prompt.
5. You should receive a “successful” message. Quit Outlook, wait a few seconds, start Outlook.
6. The Shared NetID email account will be added to Outlook. You should receive emails to the Shared NetID email account. You should be able to send emails from the Shared NetID email account.
Windows – New Outlook (These directions apply to what Microsoft calls “New Outlook.”)
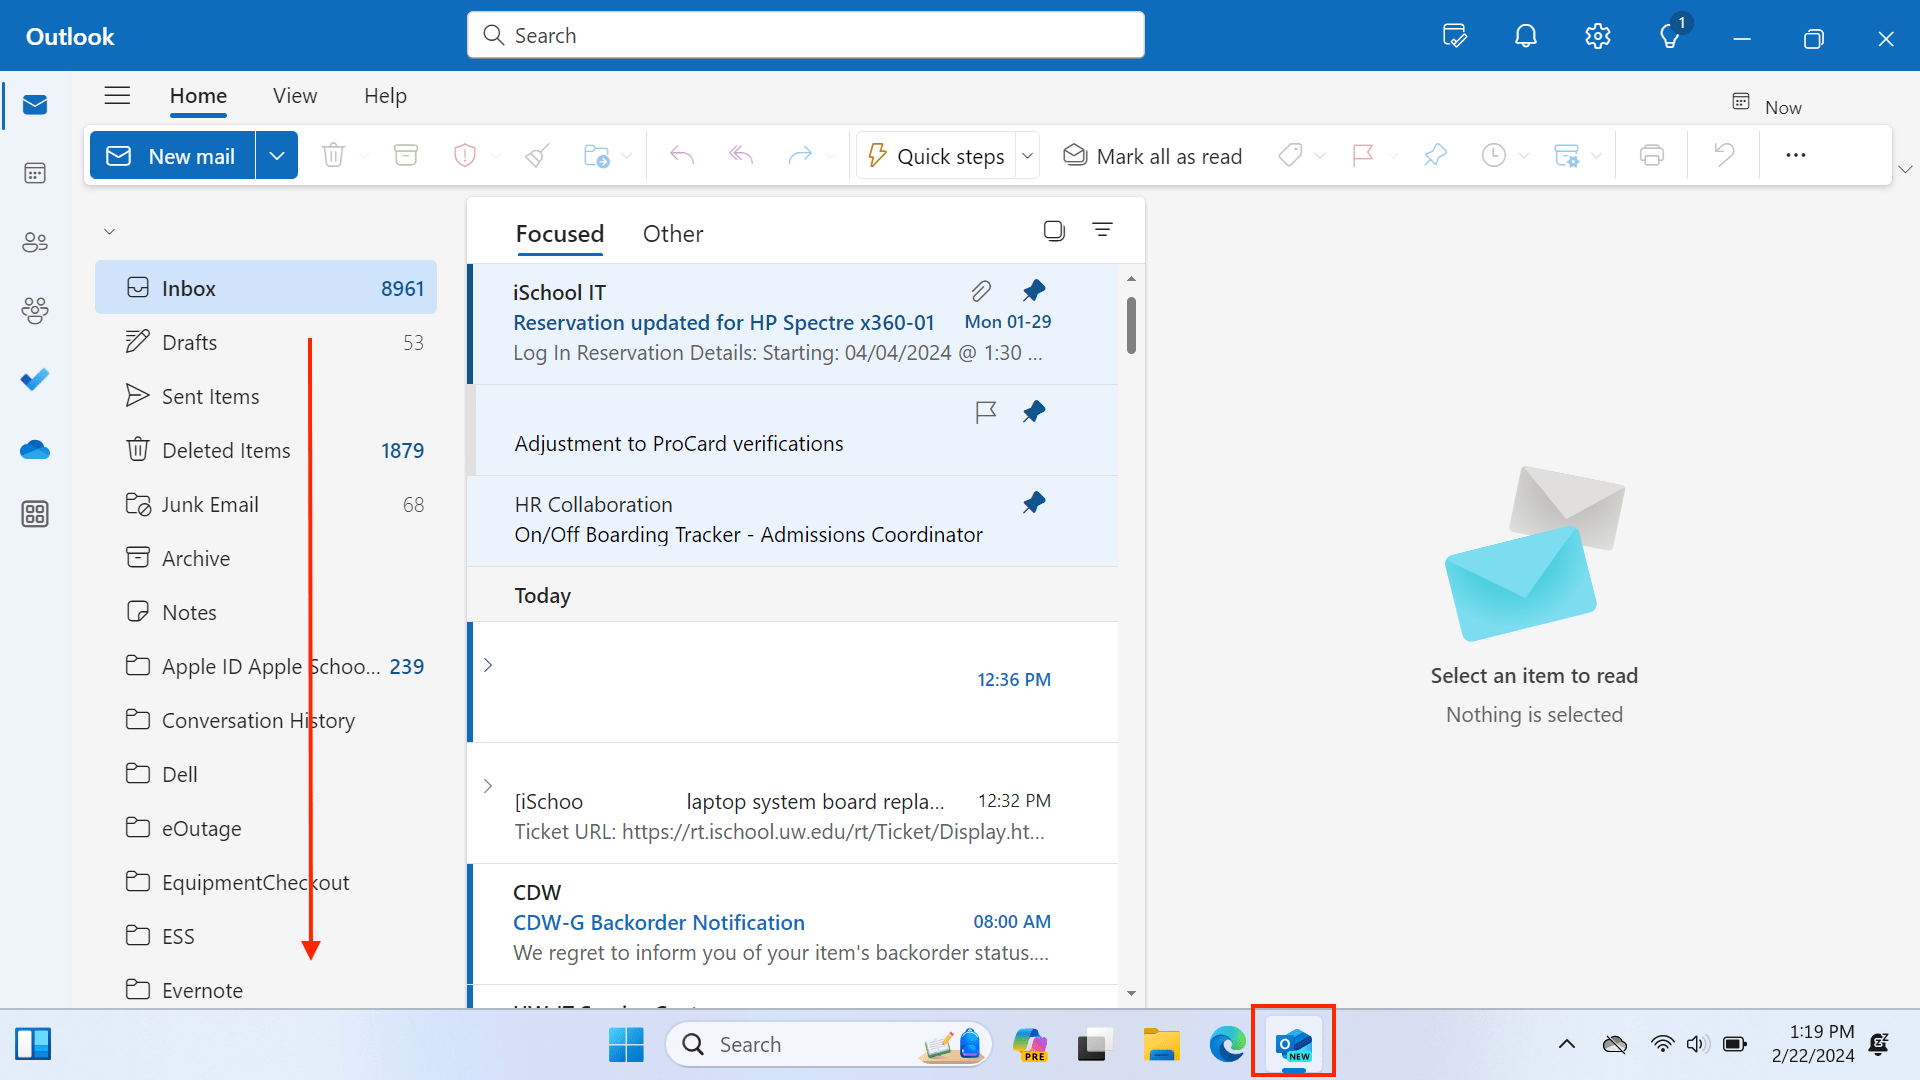
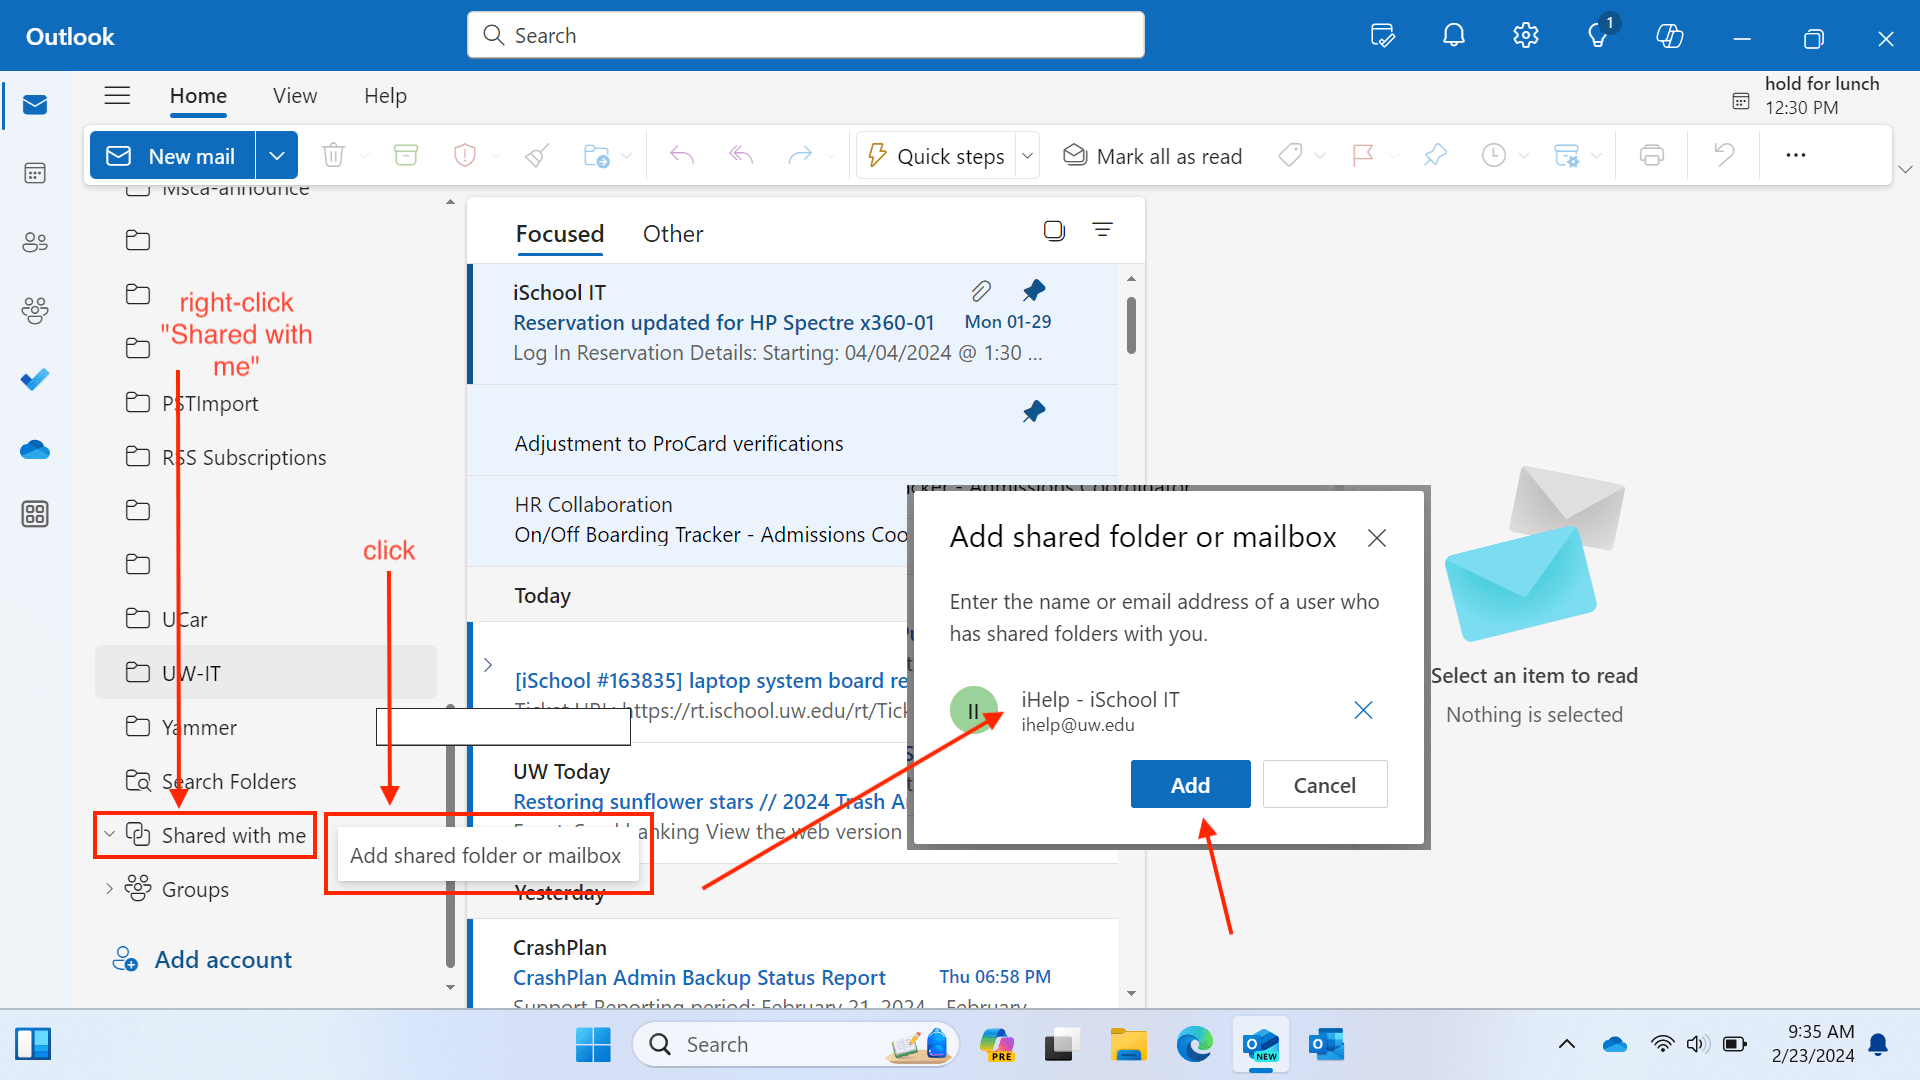
1. Scroll down the folder list to the “Shared with me” folder.
2. “Expand” the Shared with me folder to see and use shared email accounts you have access to. If you do not see any shared email accounts see step 3.
3. Right-click the Shared with me folder. Click Add shared folder or mailbox. Type in the Shared NetID email address (ihelp@uw.edu is used as an example). Click Add.
macOS – New Outlook (These directions apply to what Microsoft calls “New Outlook.”)
1. In the Outlook application, click File, mouse-over Open, click Shared Mailbox….
2. Type in the Shared NetID email address (ihelp@uw.edu is used as an example). Click Add.
3. After a few seconds the Shared NetID email account should appear in Outlook. You should receive emails to the Shared NetID email account. You should be able to send emails from the Shared NetID email account.
2. Right-click the word Folders, click Add shared folder or mailbox.
3. Search for the Shared NetID email address (ihelp@uw.edu is used as an example), click Open.
4. The Shared NetID mailbox will be available on the left as a new account as in the image below. You should receive emails to the Shared NetID email account. You should be able to send emails from the Shared NetID email account.
02 – Click the drop-down next to Manage UW NetID:. Select the Shared NetID in question. You should be redirected to a management page for the Shared NetID in question.
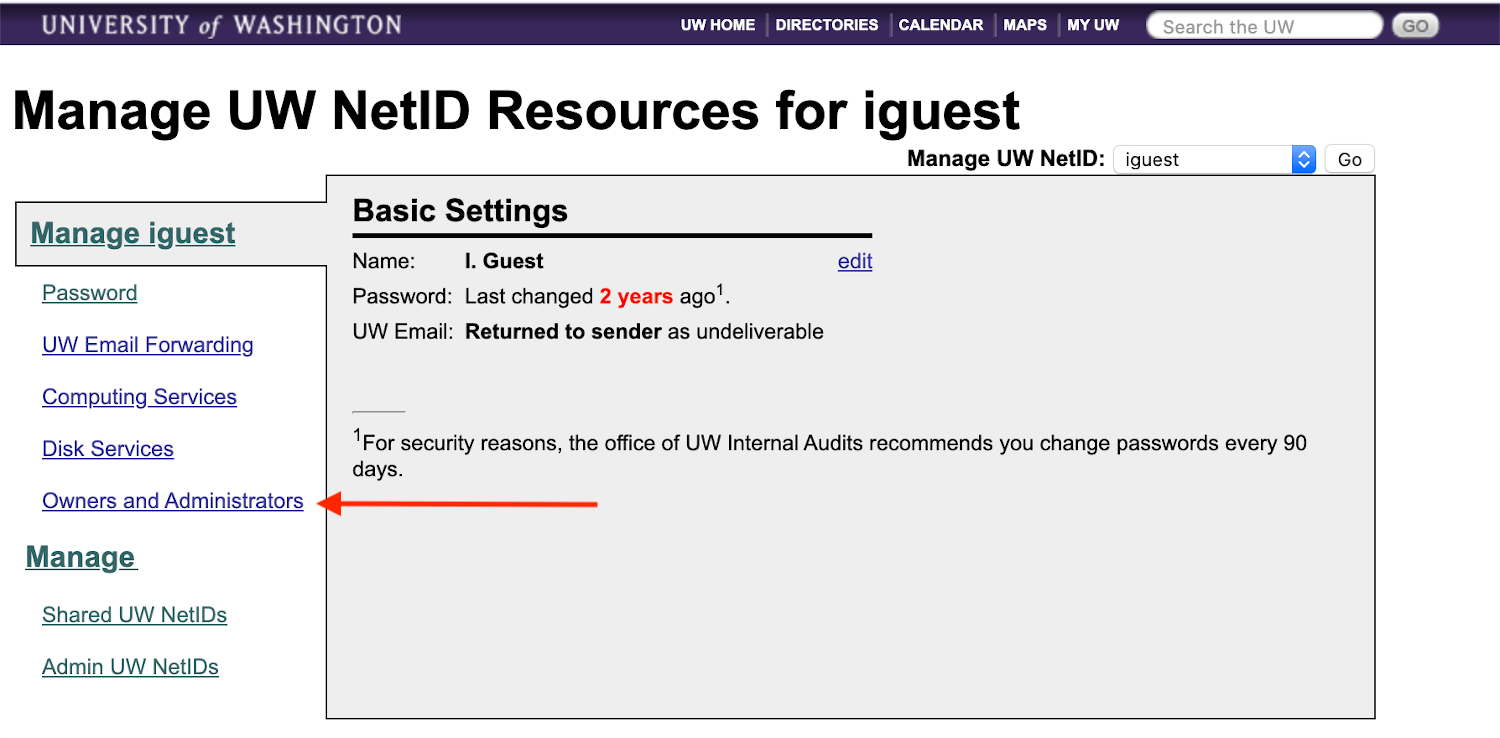
03 – Click Owners and Administrators.
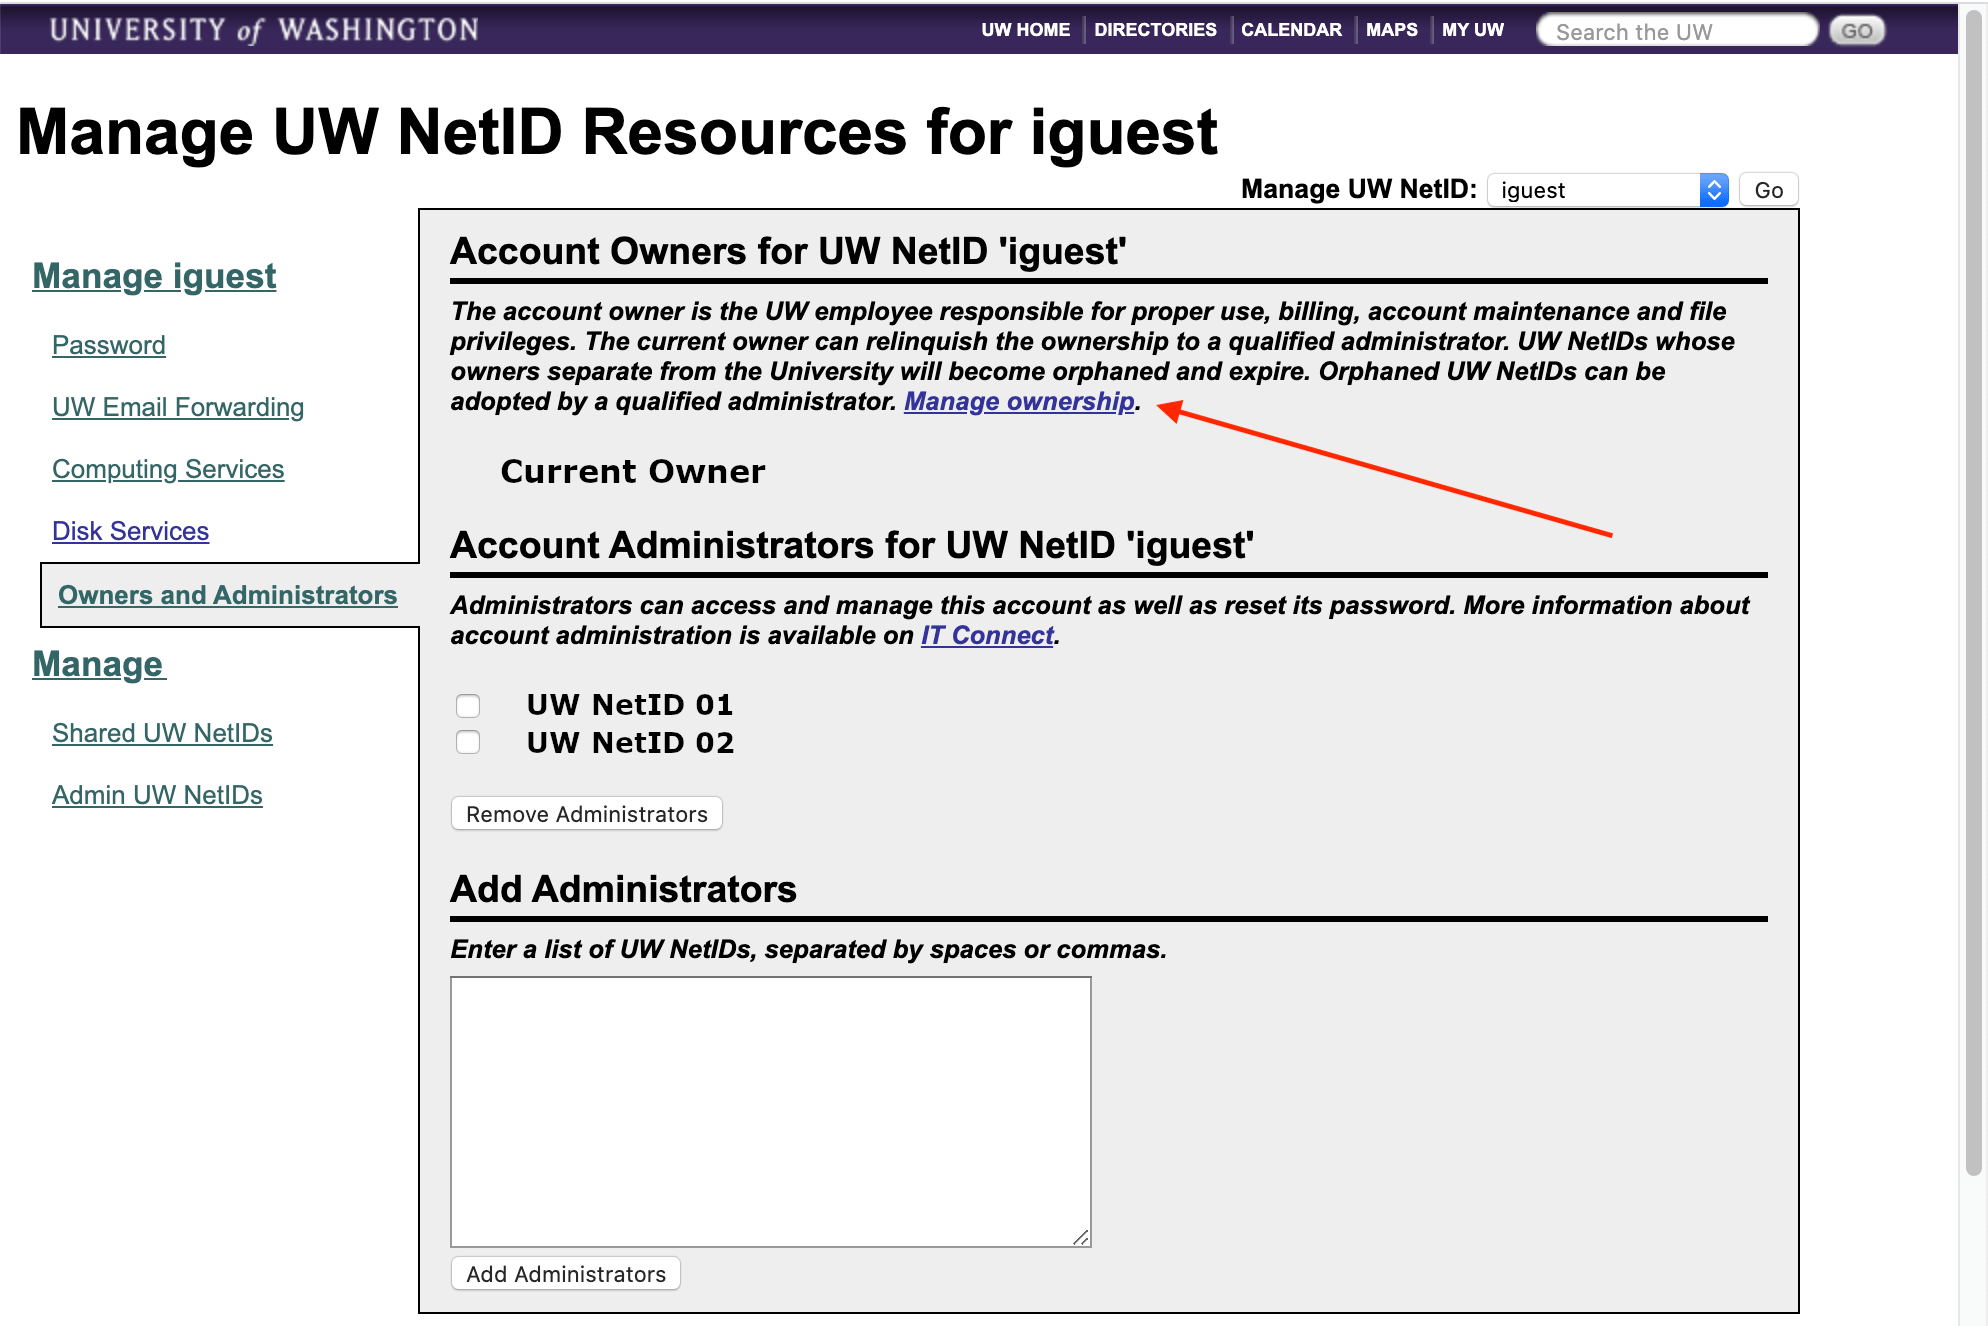
04 – If the UW NetID of the new, intended owner is not listed as an “Account Administrator”, you will need to add the new, intended owner in the “Add Administrators” box.
05 – Back on the Owners and Administrators page, click Manage ownership.
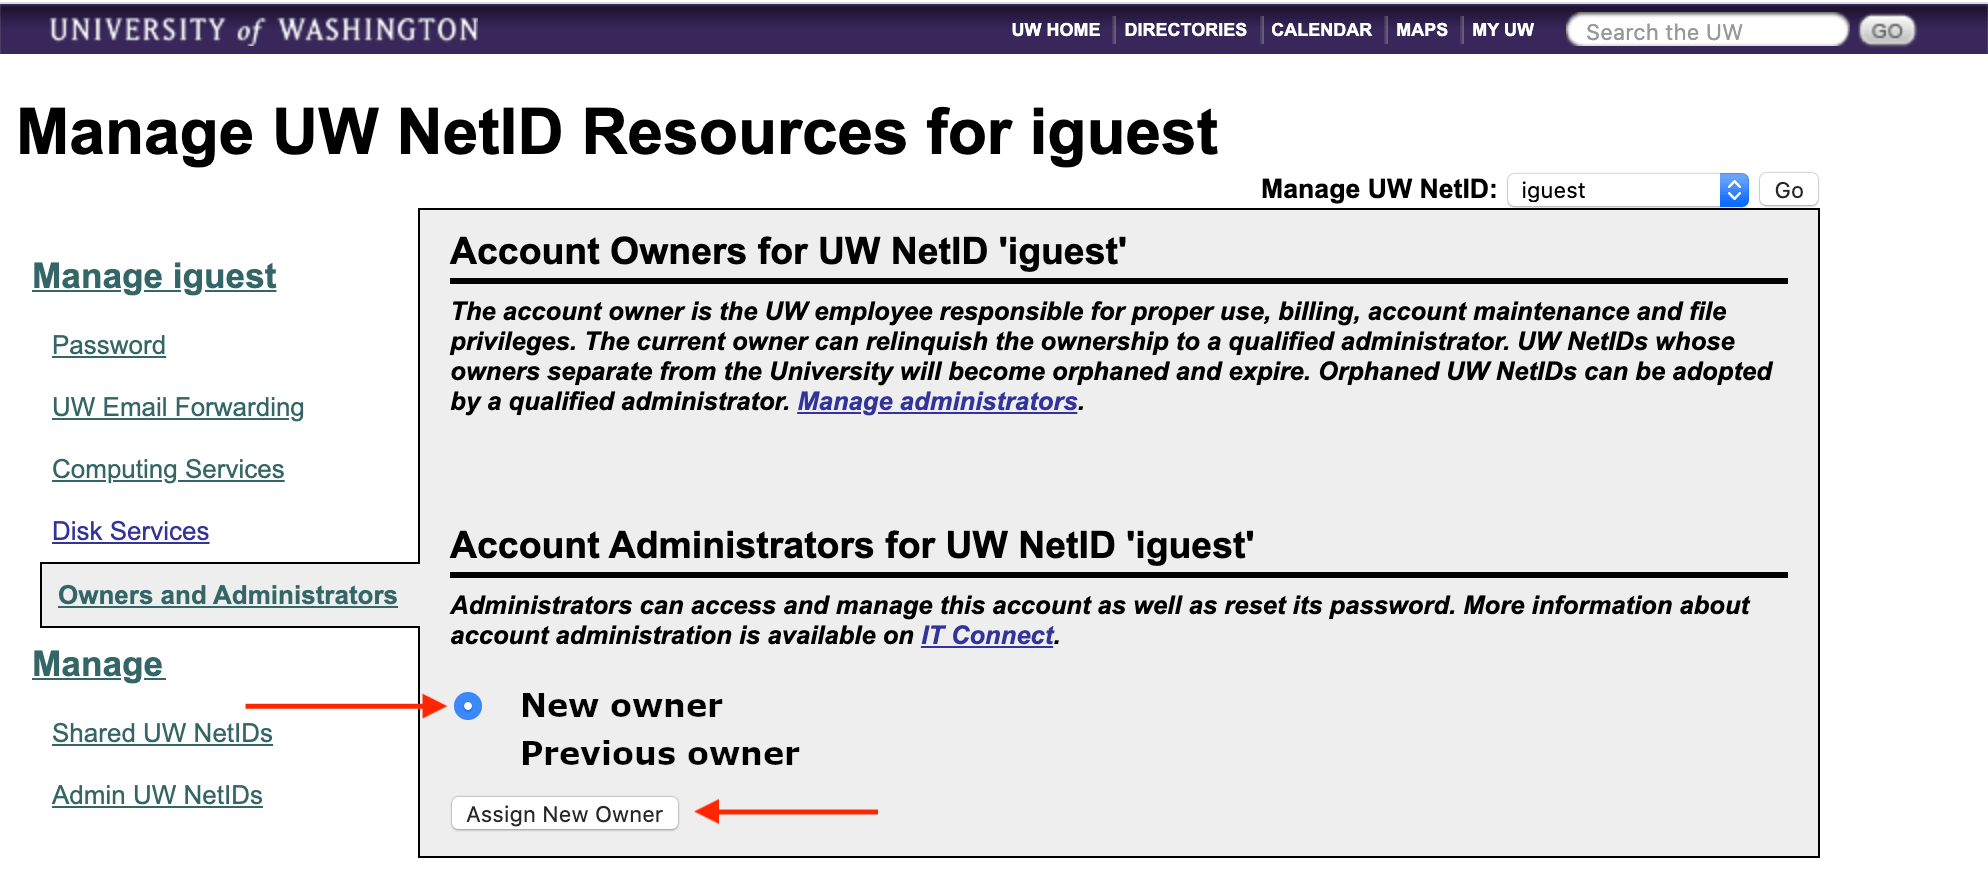
06 – Select the new, intended owner for the Shared NetID. Click Assign New Owner.
07 – Click Confirm Reassignment to complete the change.
iSchool-issued Lenovo brand laptops come with an application named “Lenovo System Update” installed.
The Lenovo System Update application regularly runs in the background to install driver updates.
Every once in a while, you may be faced with a notification telling you updates that require a computer restart are available. See example message below.
If you see the message, follow the instructions to apply the updates. In general, you should apply the updates as soon as you are able. While you have the option of clicking “Cancel”, you will need to install the updates sooner or later.
While the Lenovo System Update application does run on a regular schedule, you have the option to run it on demand, to look for driver, BIOS, and firmware updates by following the instructions on this page:
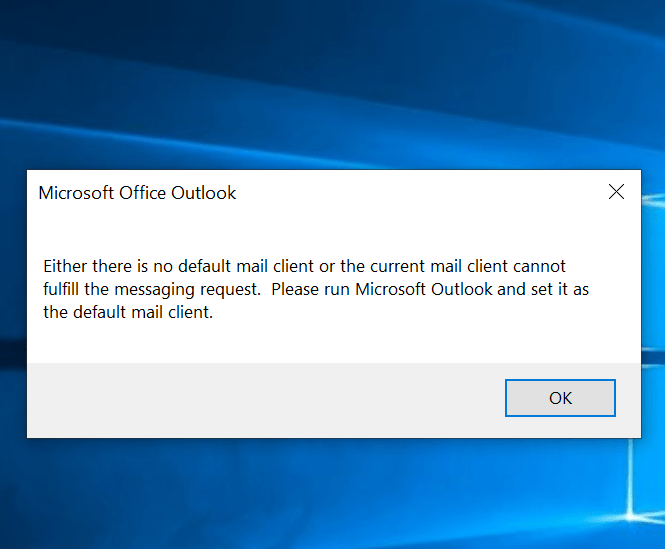
If you are using an iSchool-issued Windows laptop and continually seeing a pop-up message, with the wording “Either there is no default mail client or the current mail client cannot fulfill the messaging request. Please run Microsoft Outlook and set it as the default mail client.”, follow the steps below:
1) Quit Outlook.
2) If you are off campus, connect to the Husky OnNet VPN by following these steps:
3) Right-click the lower-left Windows icon, click Windows PowerShell (Admin), click Yes.
4) In the “PowerShell” application window that opens, type:
gpupdate /force
press “Enter” on your keyboard
after a few seconds, you should see wording indicating “Computer Policy” and “User Policy” updated successfully.
If you see wording that the “Computer Policy” and “User Policy” updated successfully, the Outlook “…no default mail client…” message should stop appearing.
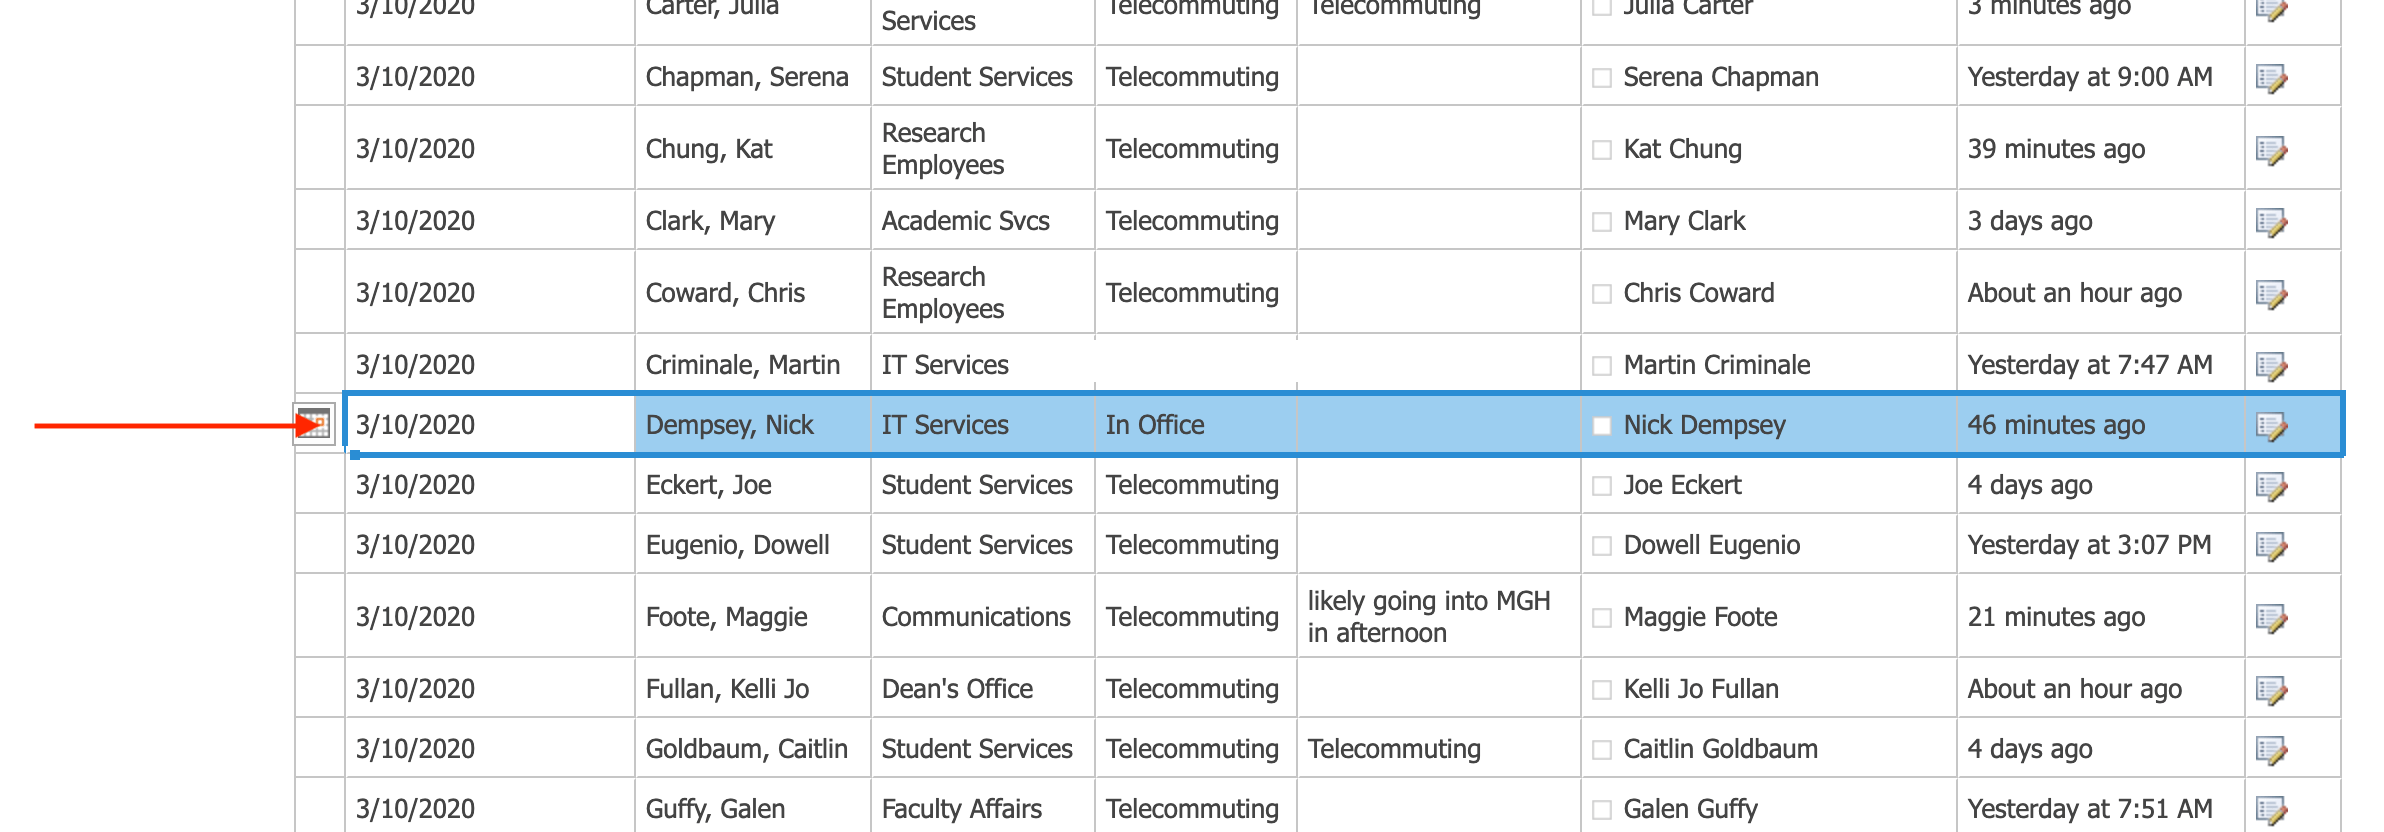
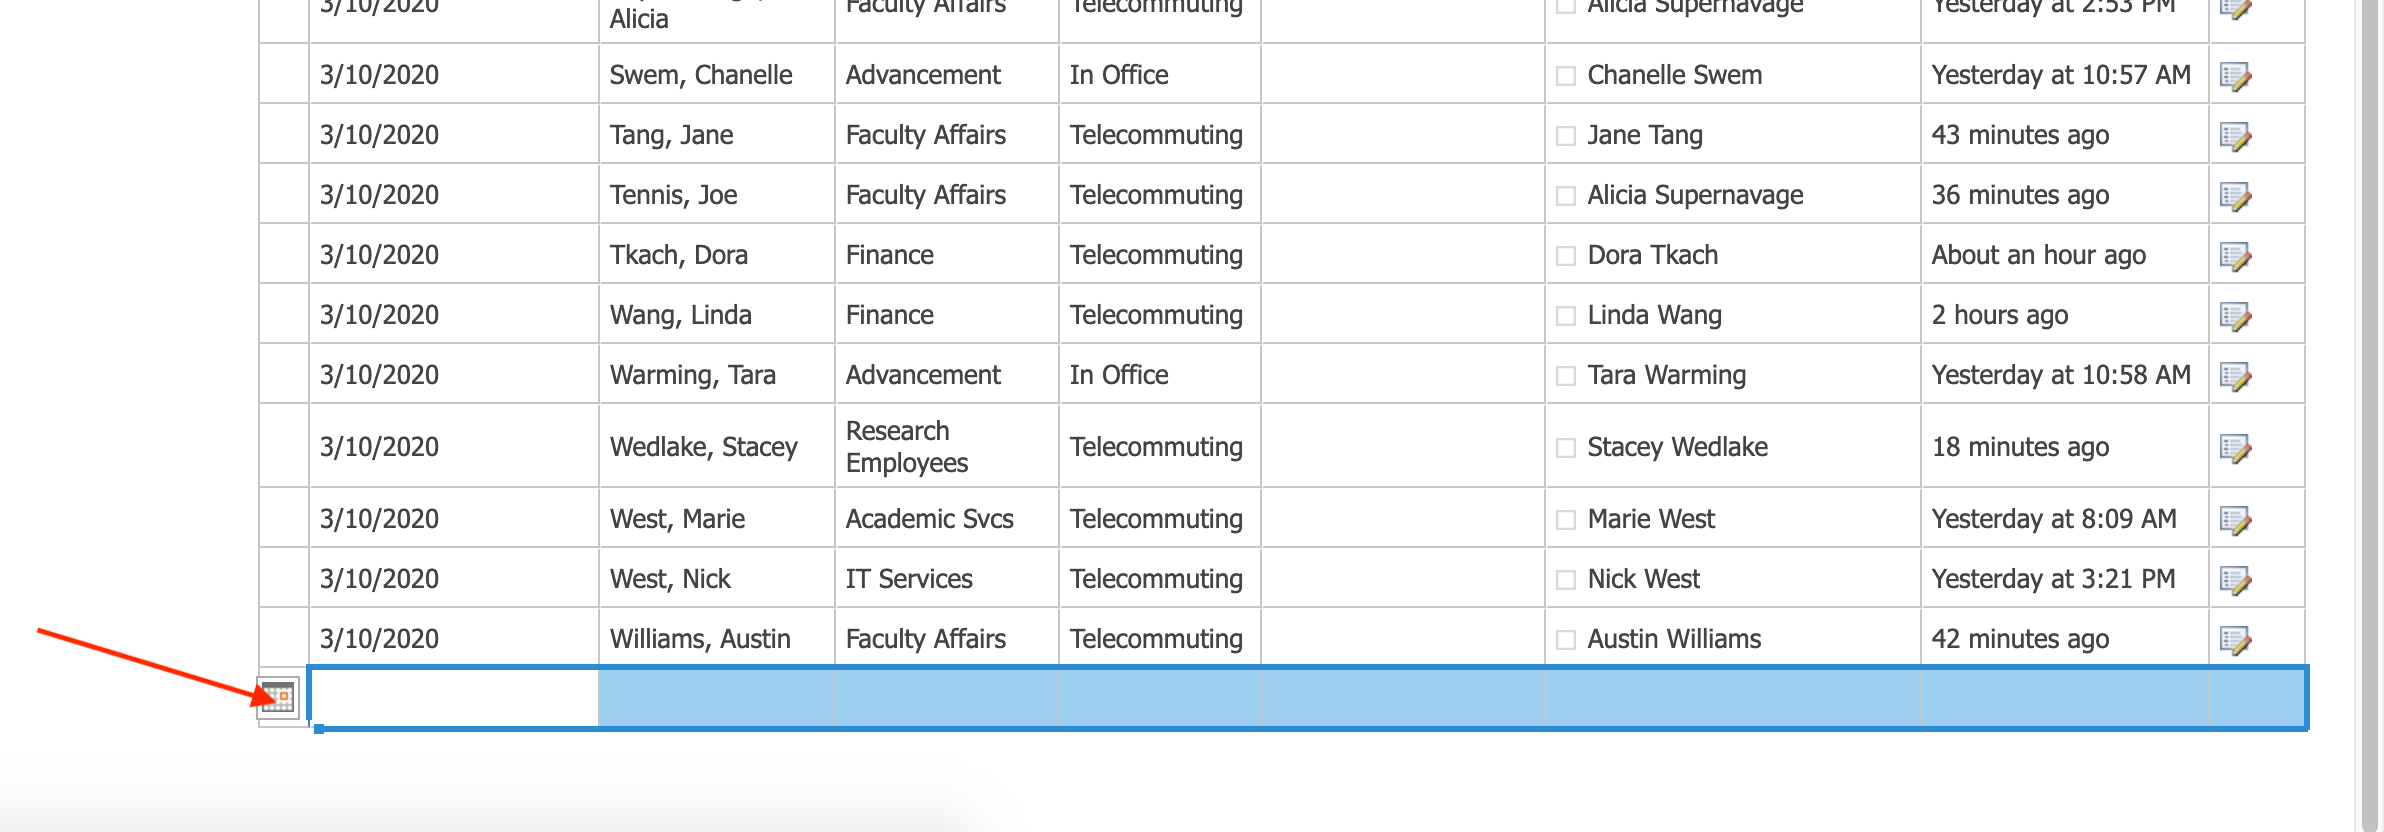
03) click the box next to a row to select the entire row (you can click-and-drag to select/highlight multiple rows), copy the row(s) using keyboard commands (Windows – Ctrl+C) (macOS – command+C)
04) scroll down to the bottom of the page/list to find an empty row entry, click the far-left-box next to the empty row, paste the row(s) using keyboard commands (Windows – Ctrl+V) (macOS – command+V)
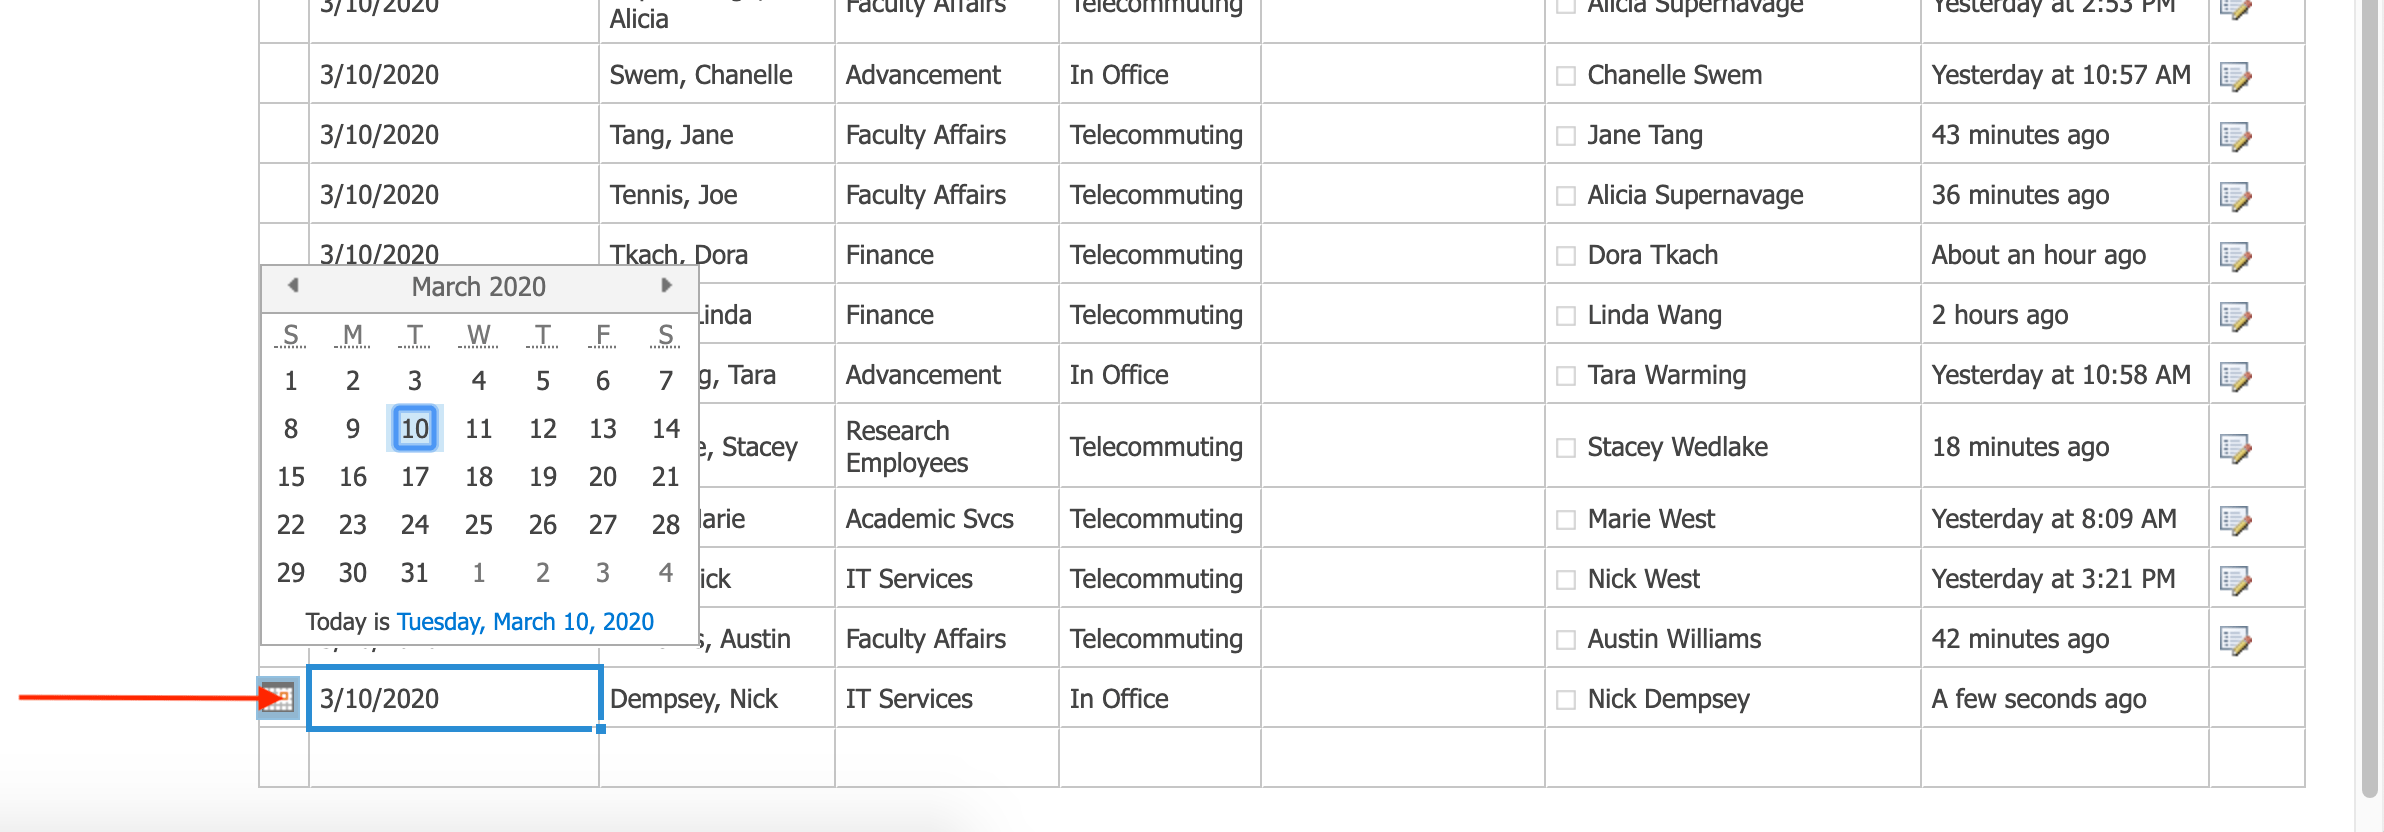
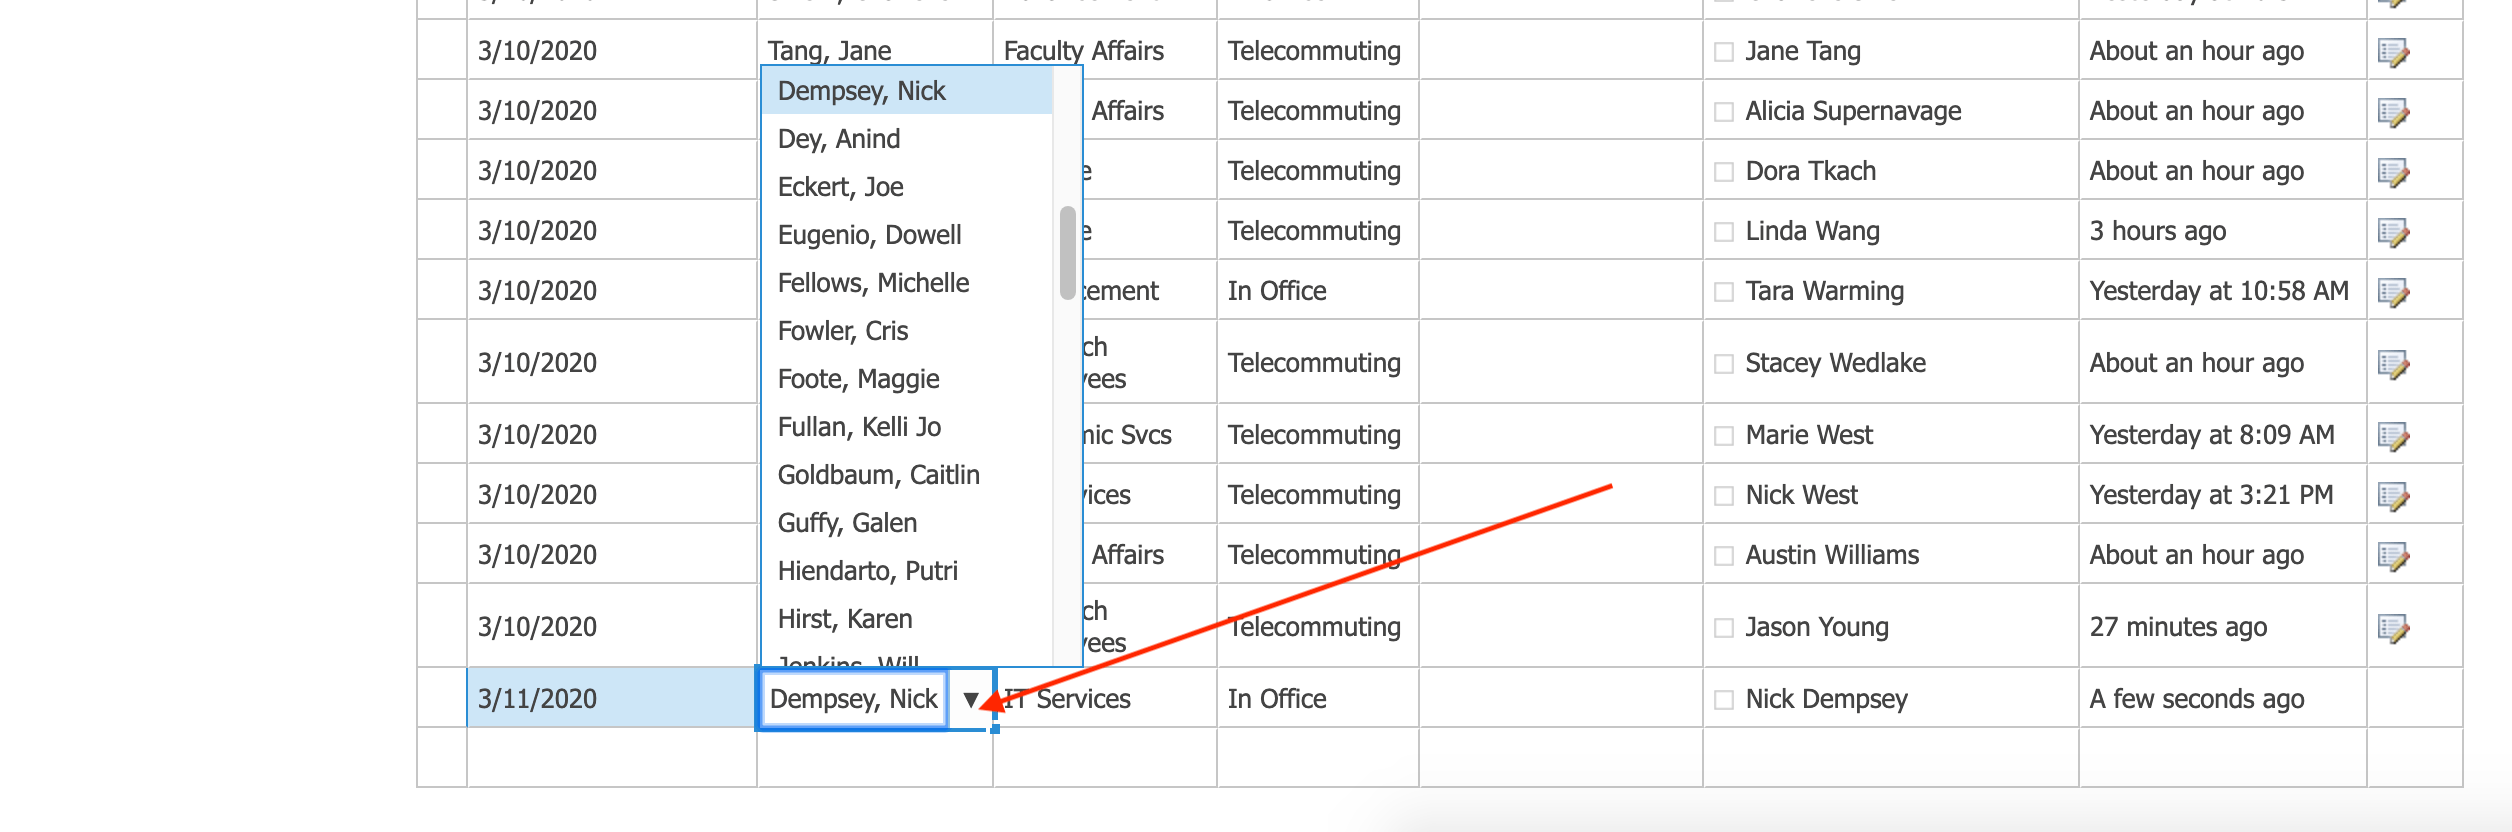
05) click the calendar icon to edit the date as necessary, click the drop-down button next to other entries to edit as necessary
06) when edits are complete, scroll to the top of the page/list, click Stop to save your edits
If you have any questions after reading this article or if you need any help, please don't hesitate to contact the iSchool IT Help Desk.
https://ischool.uw.edu/help
(206) 616-3086

")