If your iSchool issued work computer is running Windows, it is possible to connect to it and use it remotely, from a separate computer.
If your iSchool issued work computer is a Mac and you are looking to connect to it and use it remotely, see this page.
In order to remote into your iSchool Windows work computer:
a) You need to know your computer’s name.
b) The computer must allow remote connections.
c) The computer must be powered on and not in sleep mode.
d) The computer must be connected to the UW campus network.
After confirming a through d above, follow these instructions to access your Windows work computer from a separate computer.
How to find your iSchool computer name
Windows 10
Windows 10
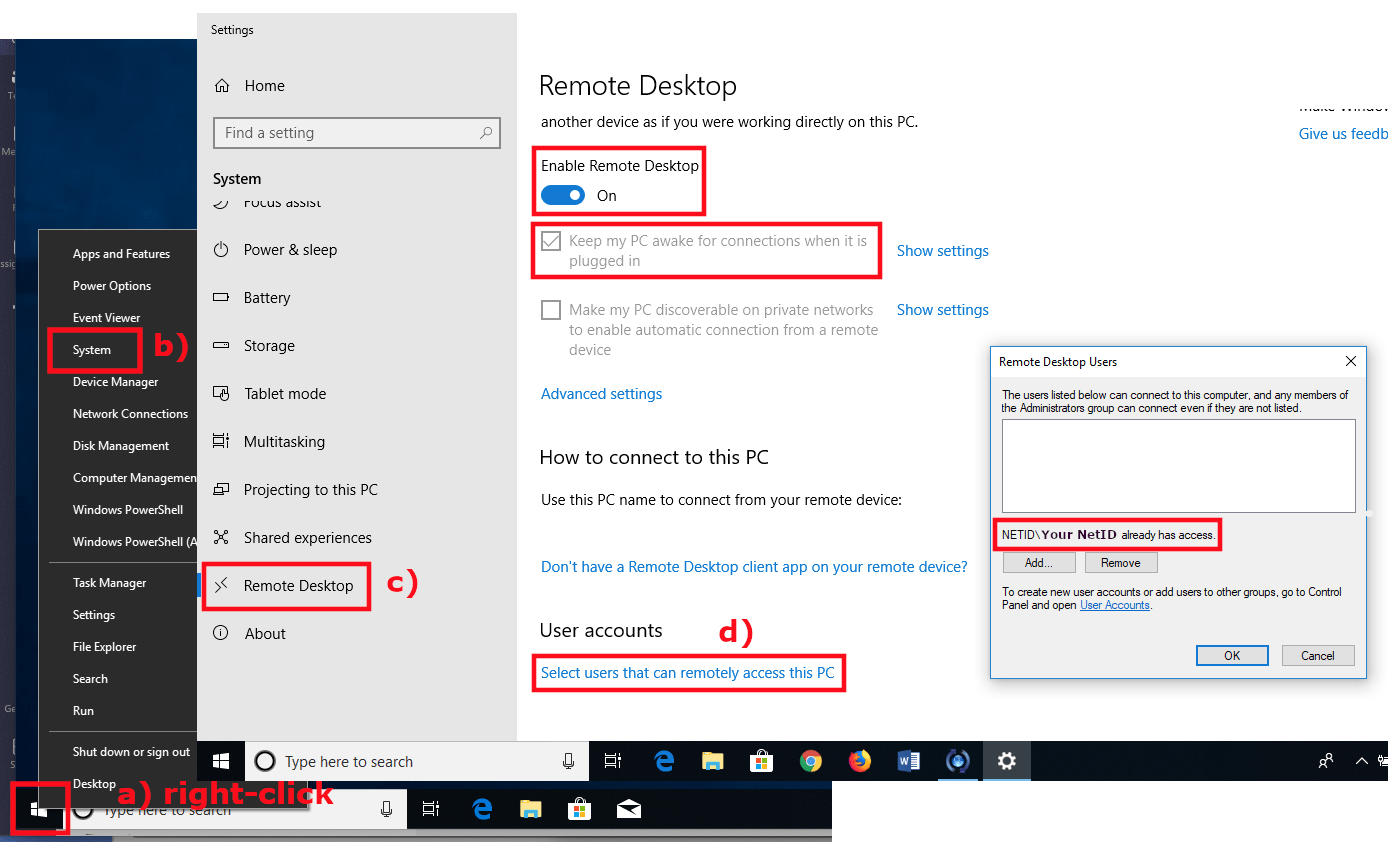
1) right-click the lower-left Windows icon, click System
your computer’s name is next to “Device name” or “Computer name:” (depending on Windows 10 version) and usually something like “is-YourNetIDx220” or “is-YourNetID450” or “is-YourNetID360” or “is-YourNetIDx1c”

Confirm your iSchool work computer will allow remote connections
Windows 10
Windows 10
1) right-click the lower-left Windows icon, click System, click Remote Desktop, click Select users that can remotely access this PC
2) confirm the following settings:
Enable Remote Desktop should be On
Keep my PC awake for connections when it is plugged in should be checked
in the Remote Desktop Users window, you should see NETID\Your NetID already has access.
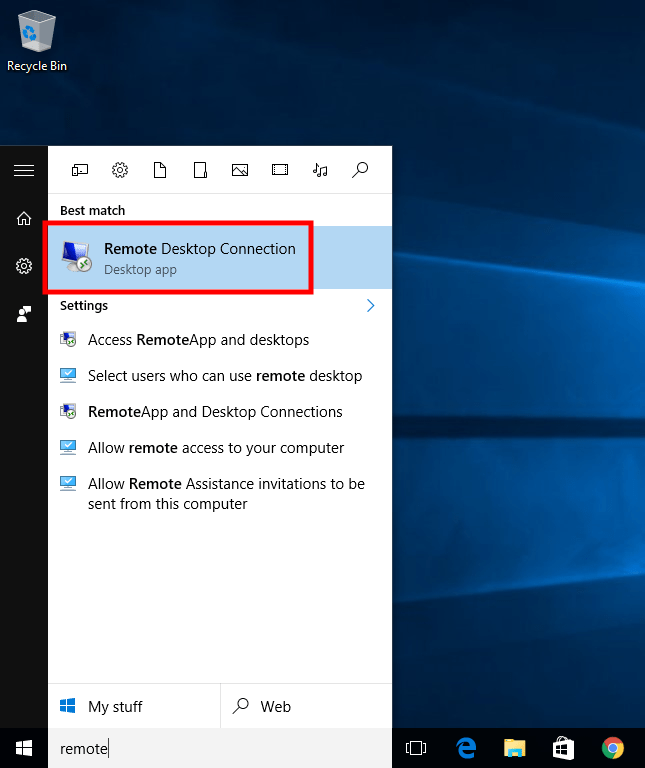
Connect to your work computer from a separate computer (follow these steps from your home computer)
connecting from a Windows 10 computer
connecting from a Mac OS X computer
Windows 10
1) start the application Remote Desktop Connection (already installed on any Windows 10 computer)
2) click Show Options, click Advanced, click Settings…
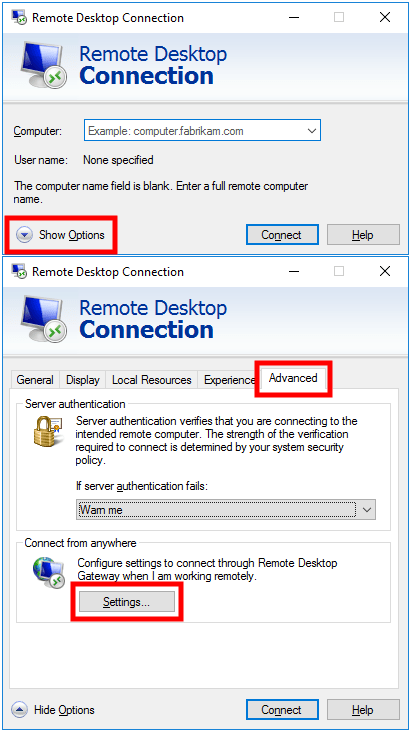
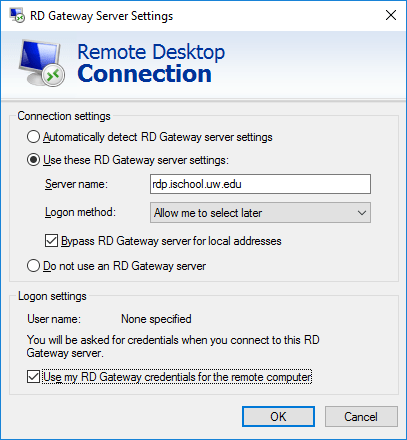
3) for Connection settings:
check Use these RD Gateway server settings
Server name: rdp.ischool.uw.edu
Logon method: Allow me to select later
check Bypass RD Gateway server for local addresses
for Logon settings:
check Use my RD Gateway credentials for the remote computer
click OK
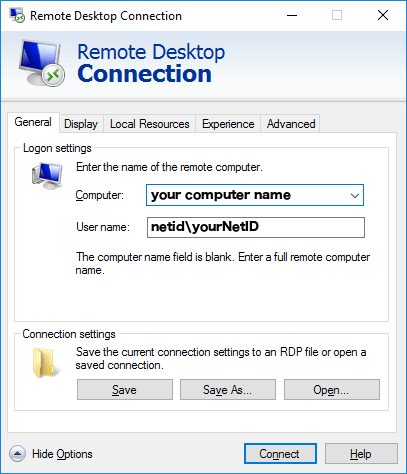
4) click General
for Computer: use your computer name (usually something like is-yourNetidx220, see this if you need to find your computer name)
for User name: use netid\yourNetID
click Connect, enter your NetID password when prompted
Mac OS X
1) download and install the free Microsoft Remote Desktop application from the Apple Store, you will need an Apple ID to download the application

2) start the Microsoft Remote Desktop application, (settings about improving performance or giving access to your microphone or webcam are up to you; select the settings you prefer), click the gear-looking-icon, click Preferences…, click Gateways
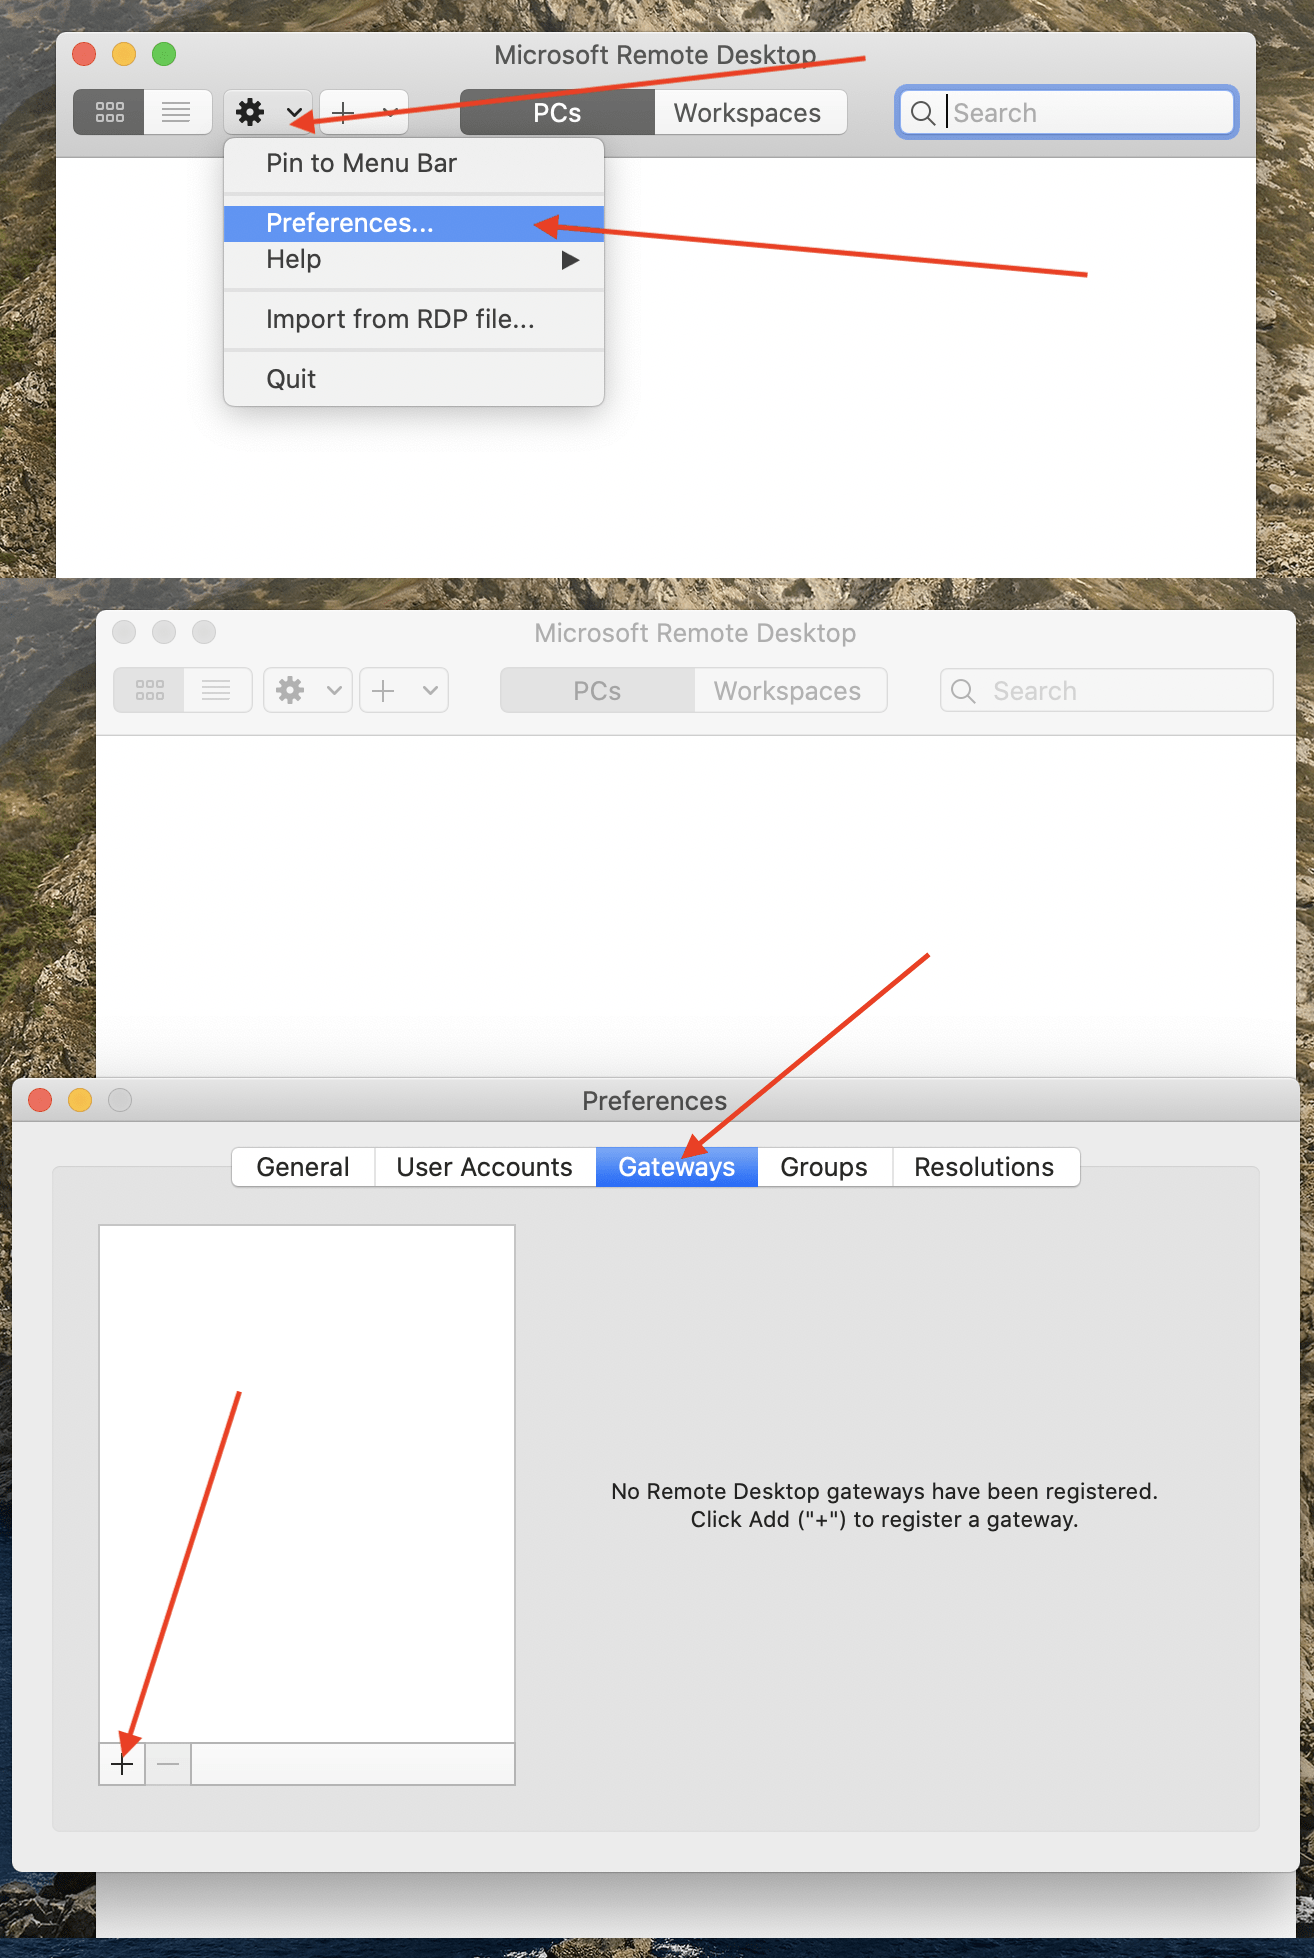
click the + button in the bottom-left, use the following settings:
Gateway name: rdp.ischool.uw.edu
Friendly name: iSchool RDP Gateway
click the drop-down next to User account:, click Add User Account…
use the following settings:
User name: netid\YourNetID
Password: YourNetIDPassword
click Add, click Add
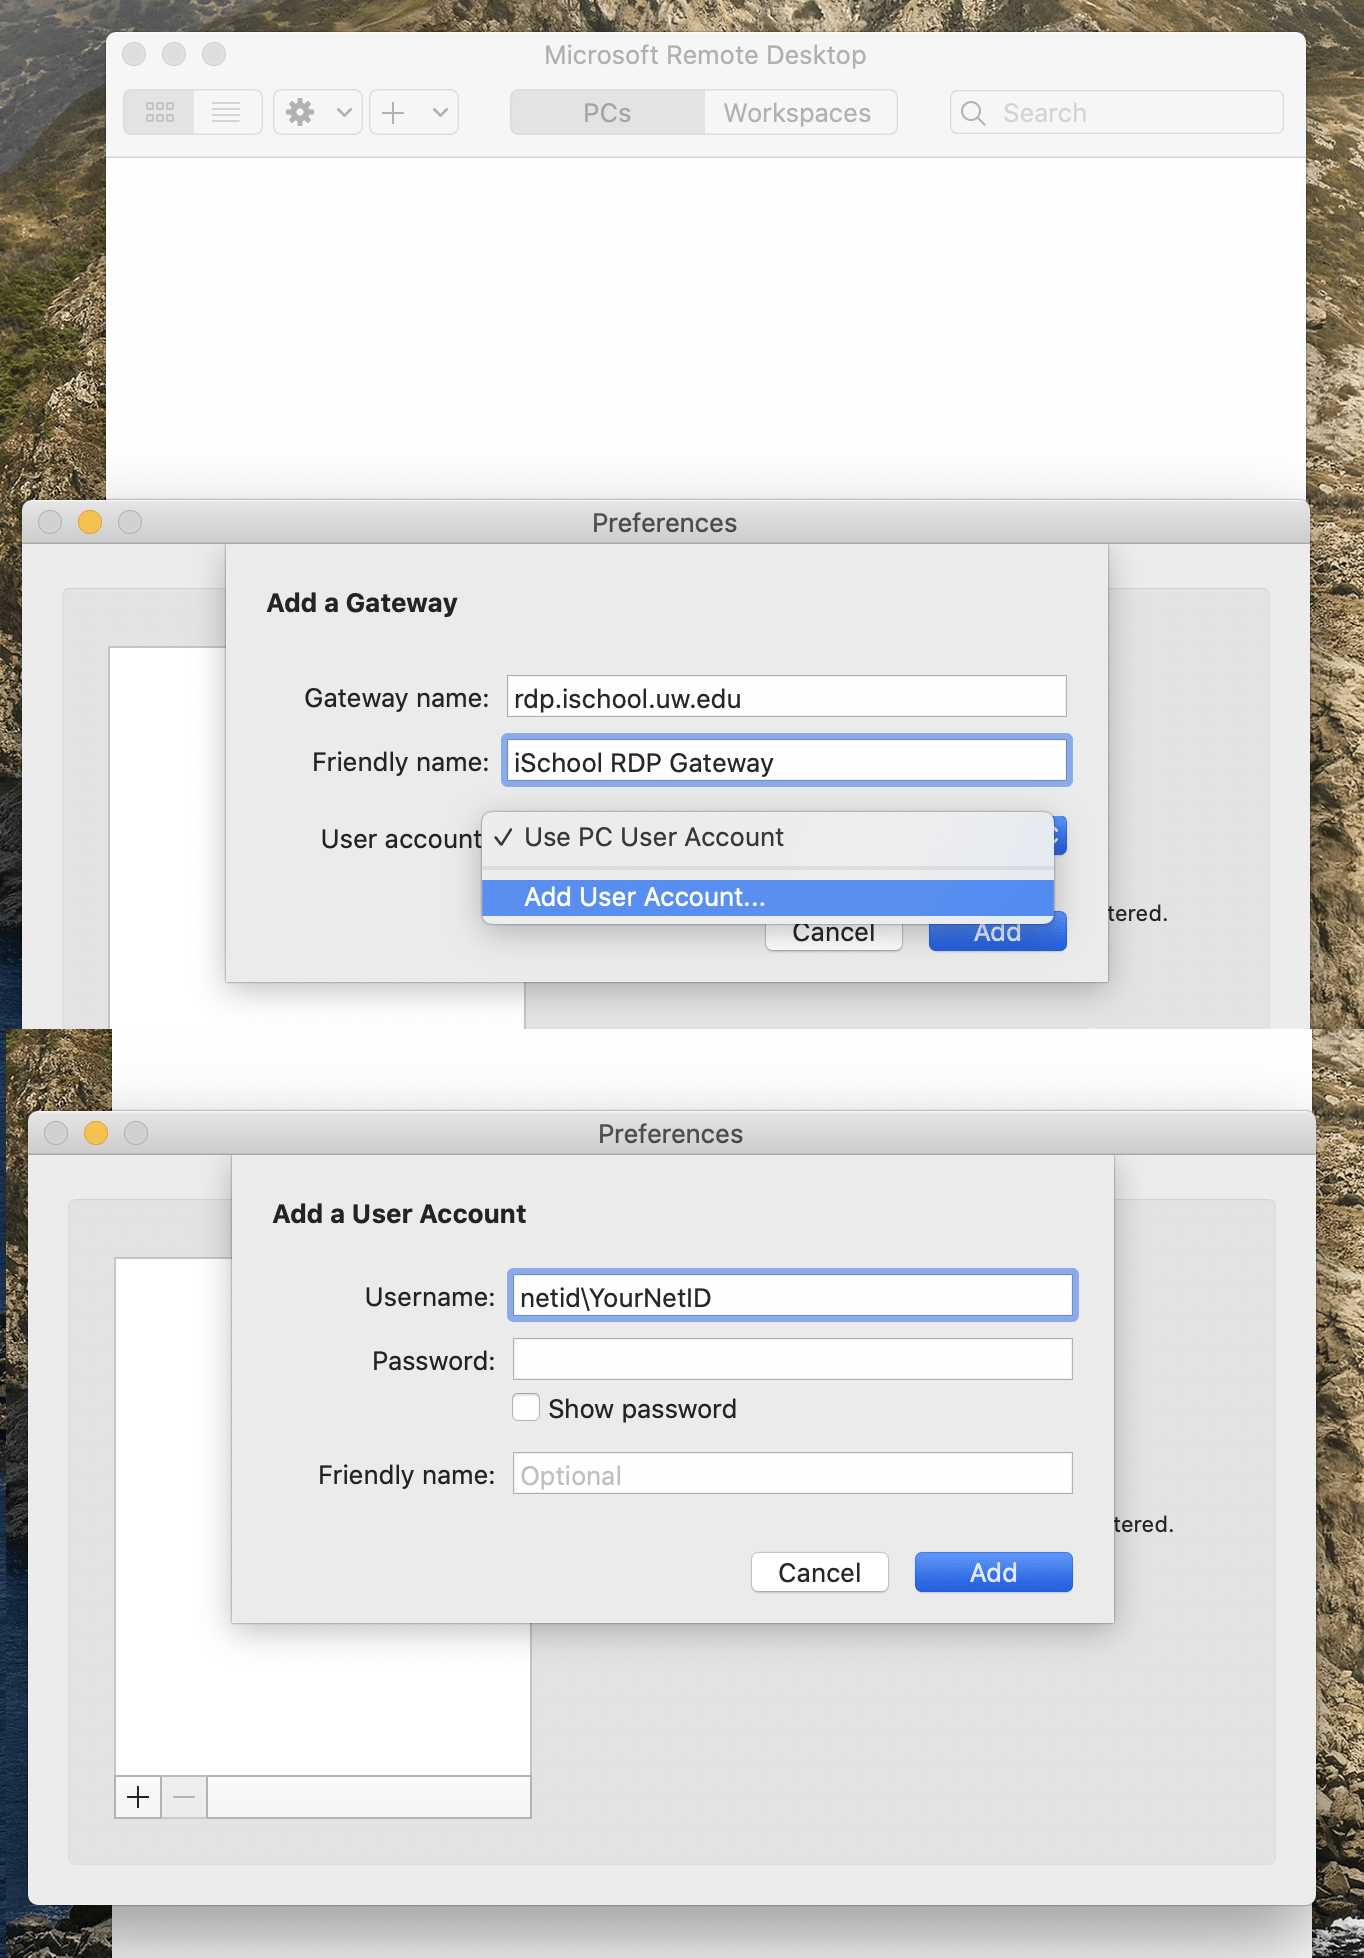
close the Preferences window
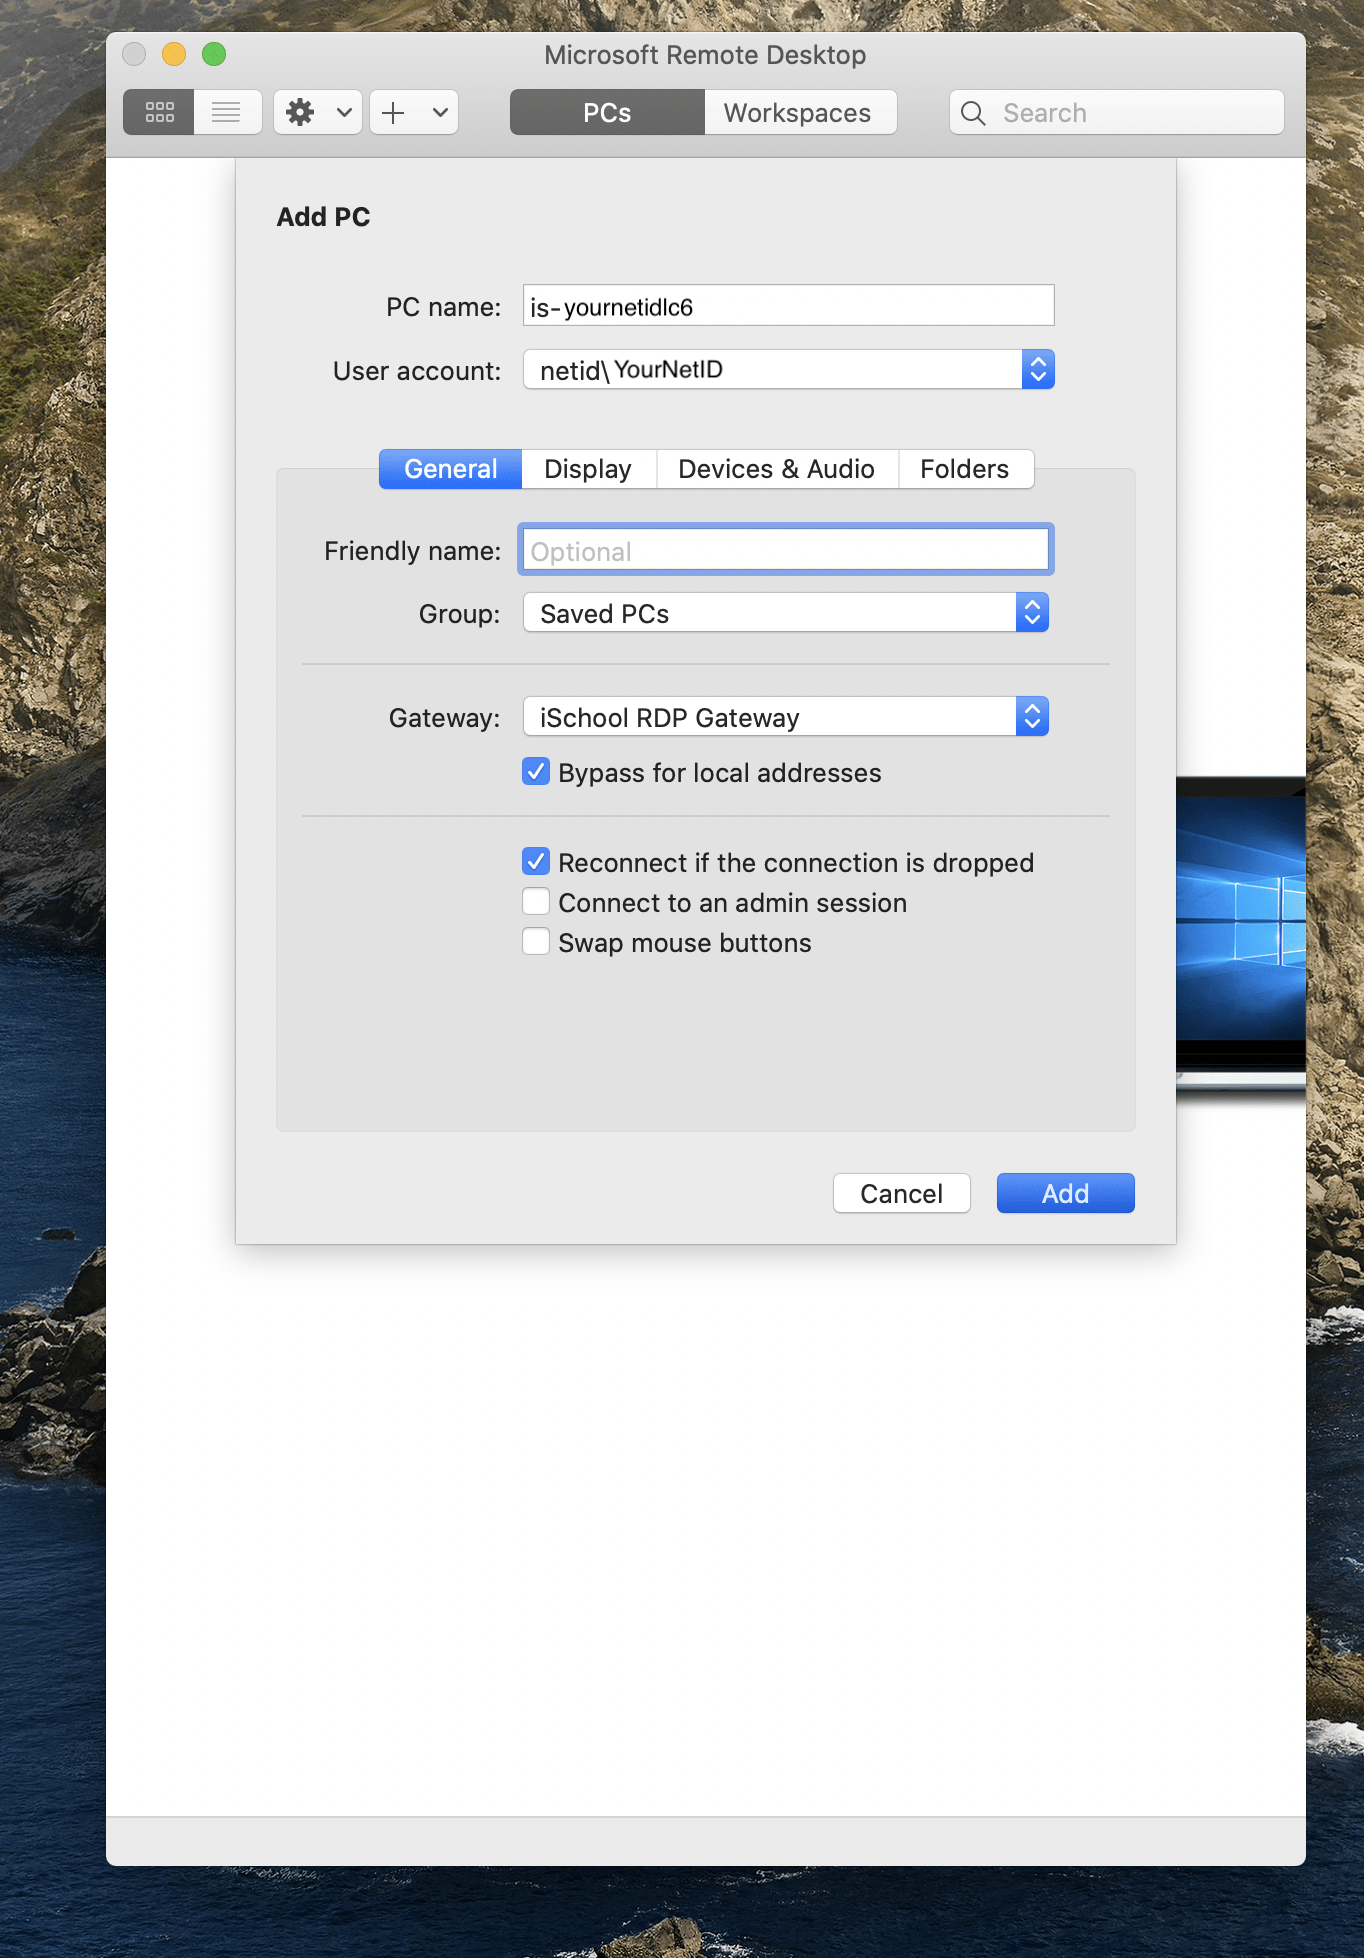
3) in the Microsoft Remote Desktop window click Add PC, use the following settings:
PC name: usually something like: is-YourNetIDlc6 or is-YourNetIDly3 or is-YourNetIDl480
User account: select the user account you created in the previous step (netid\YourNetID)
Gateway: select the iSchool RDP Gateway (or whatever name you created in Step 2)
(Other settings are fine to leave as is. They can be modified later.)
click Add
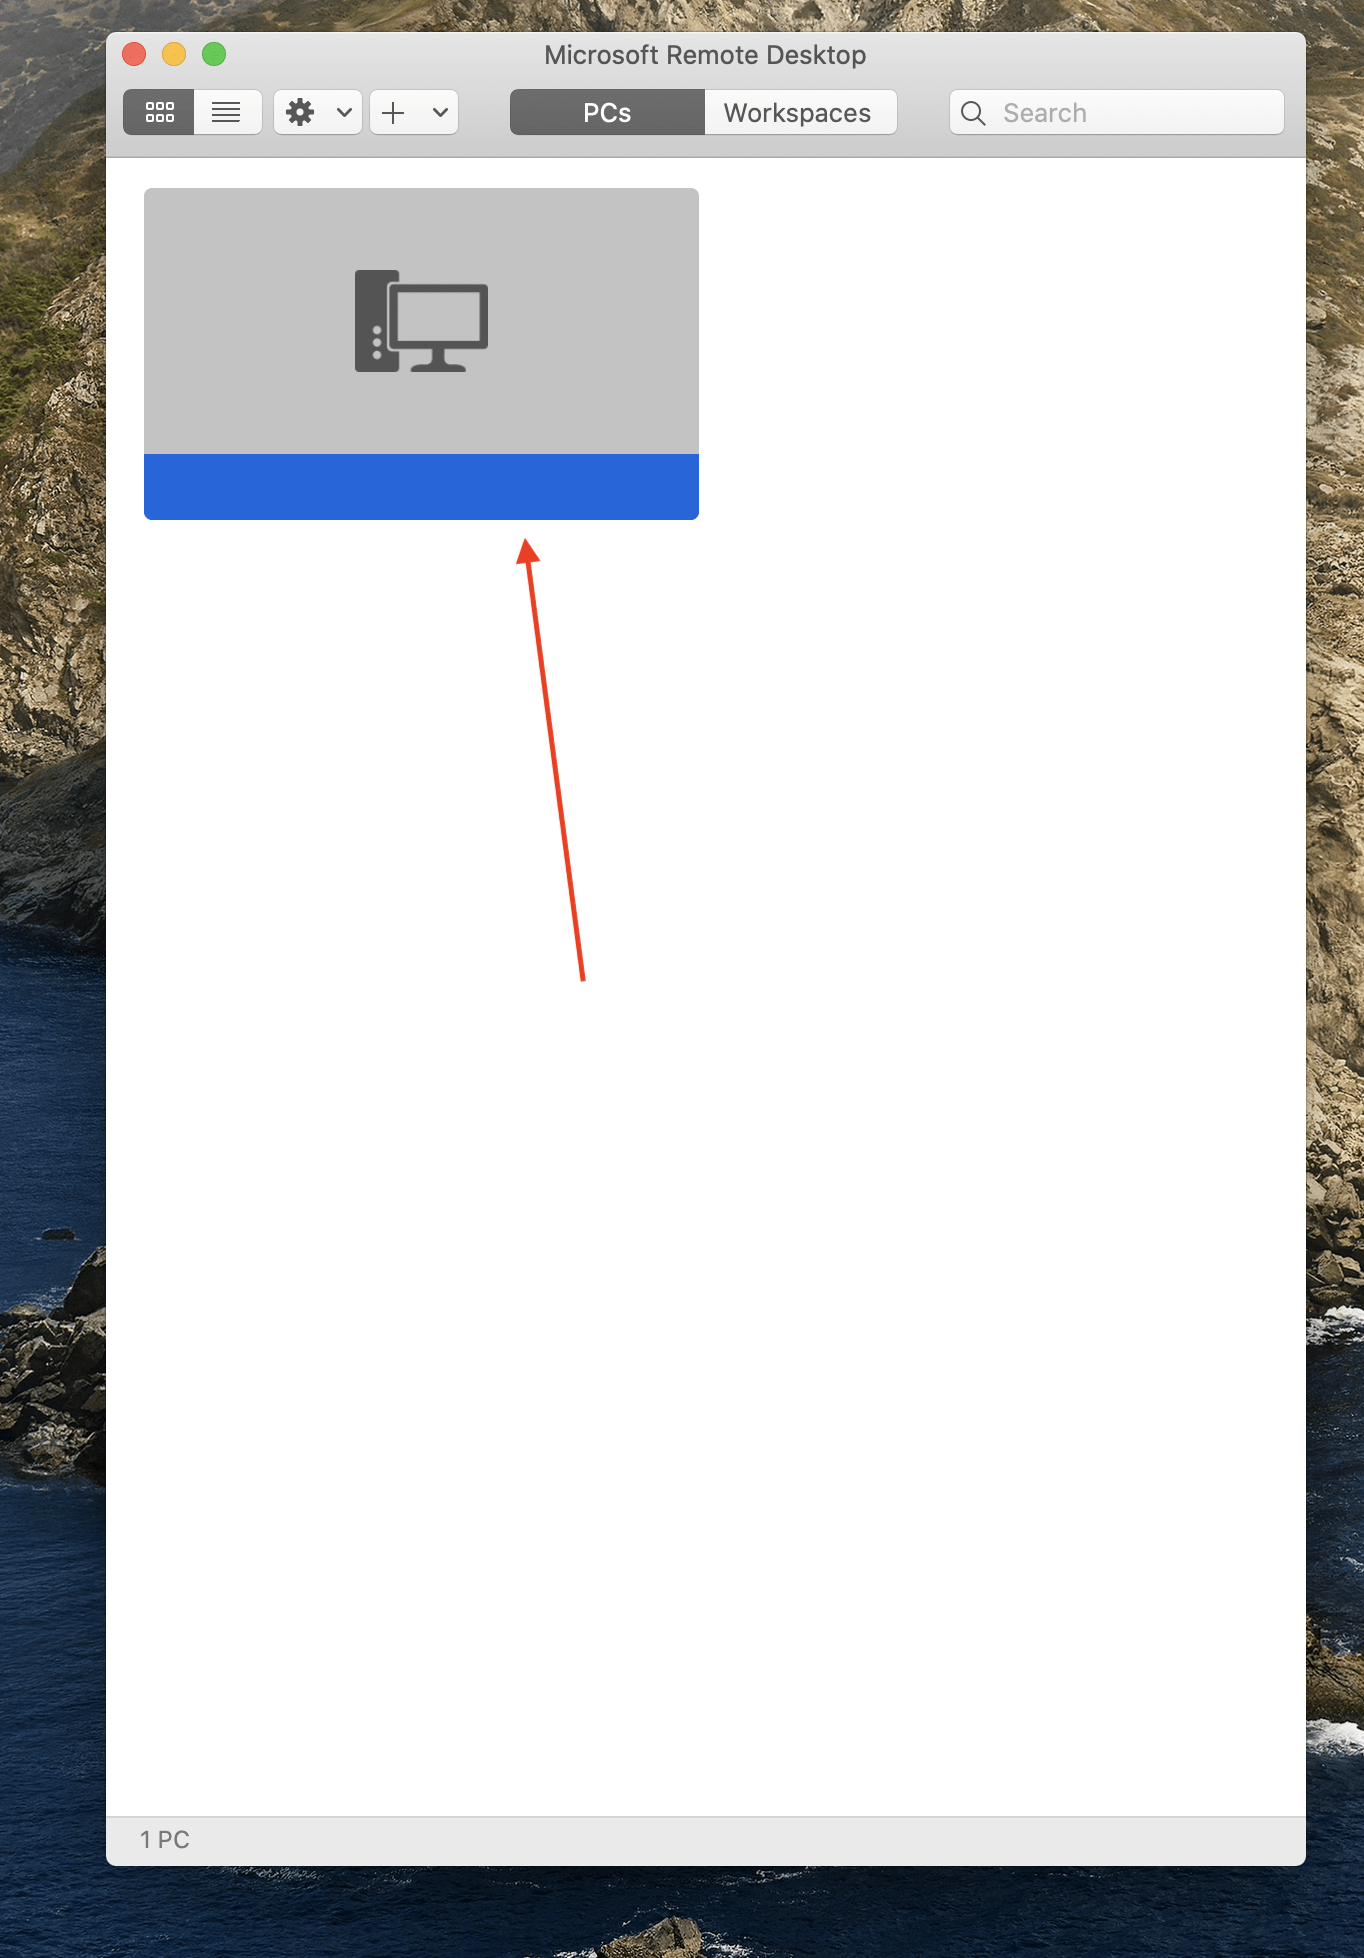
4) double-click the connection you made in Step 3, if a certificate-verification window appears it is fine to click Continue

 Calendar with others at the UW and with External Users")